Here at Proxy-Cheap, we are excited to introduce another browser that works seamlessly with our extensive selection of 100 proxies. It's called MoreLogin antidetect browser – an Antidetect browser that protects your Facebook, TikTok, Amazon, and all other platforms to prevent account banning. This browser excels at ip address masking, creating a unique digital fingerprint for each session. It's an ideal solution for various online activities, including affiliate marketing, social media marketing, and even traffic arbitrage. The MoreLogin browser is available for both Windows and Mac operating systems.
Follow these simple steps to set up and use the browser:
1. Download the MoreLogin browser from https://www.morelogin.com/download/ and proceed with the installation.
2. Create a new account or log in with your existing one.
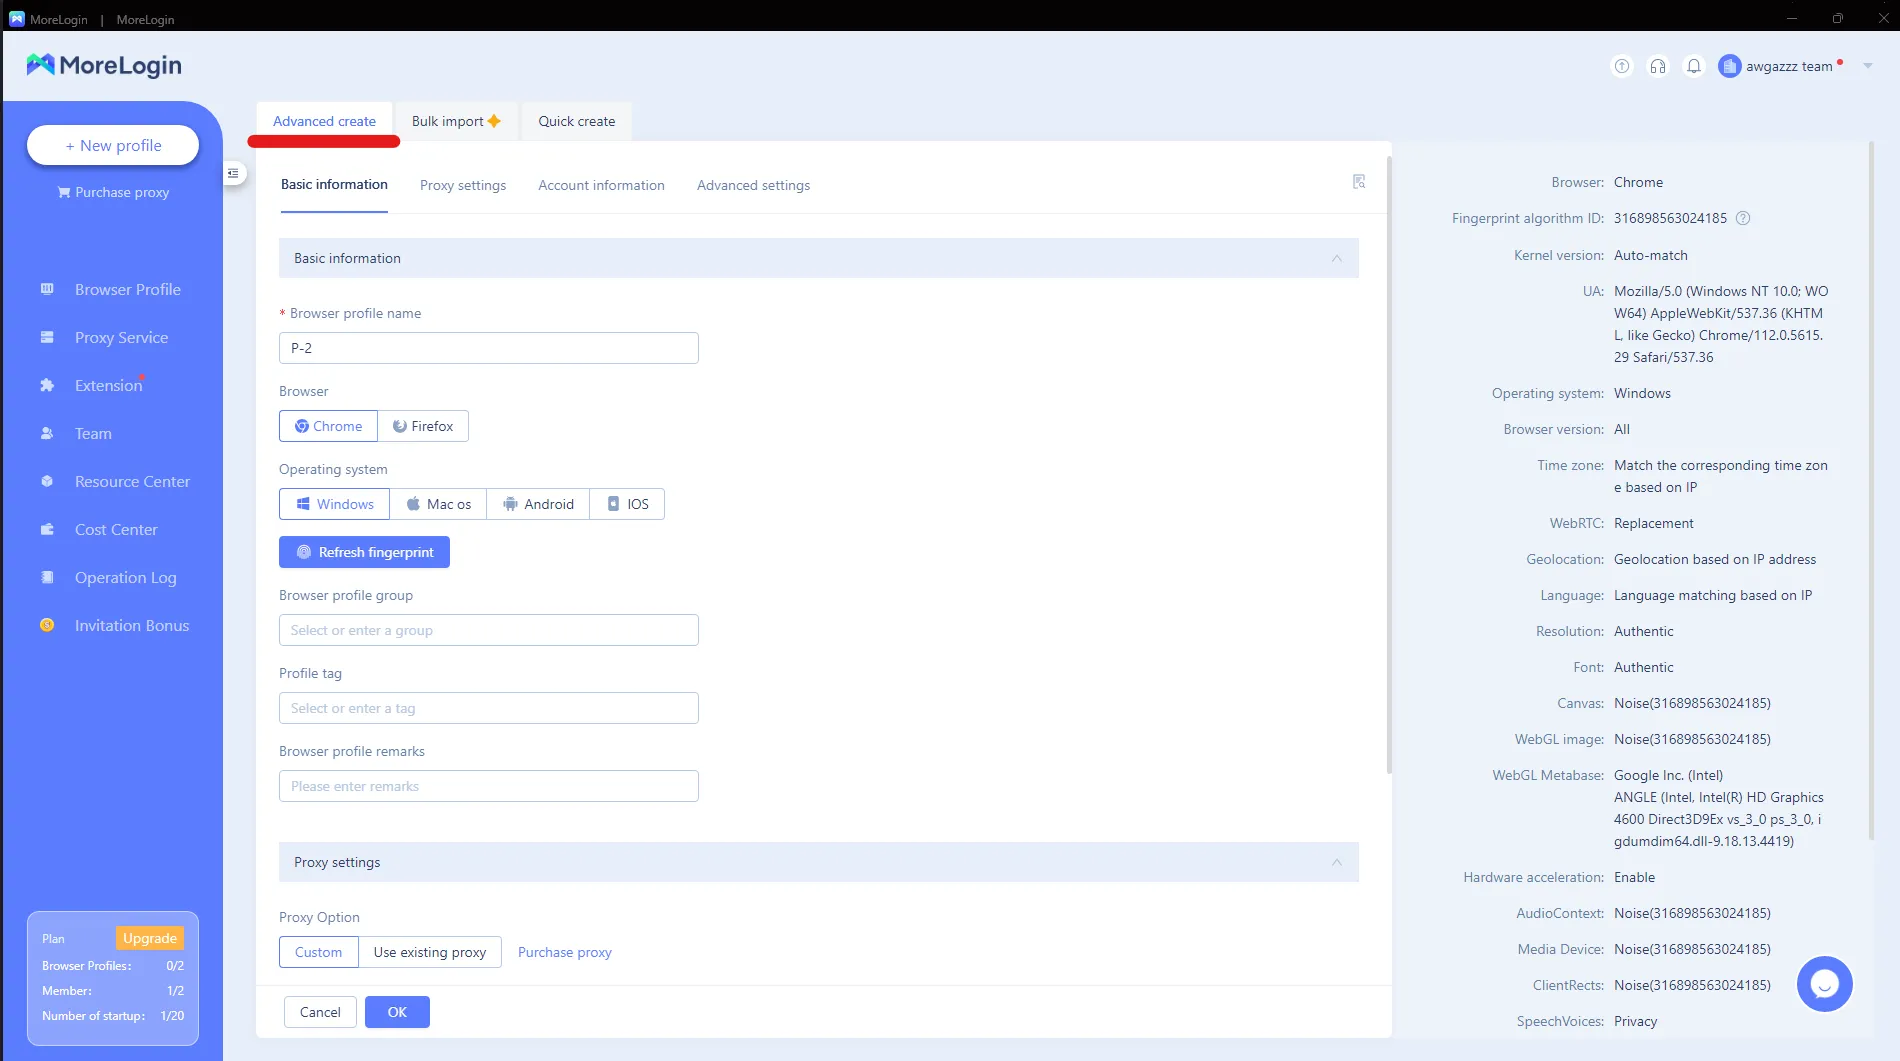
3. After successfully logging in, press "New Profile" in the top-left corner of the side menu.
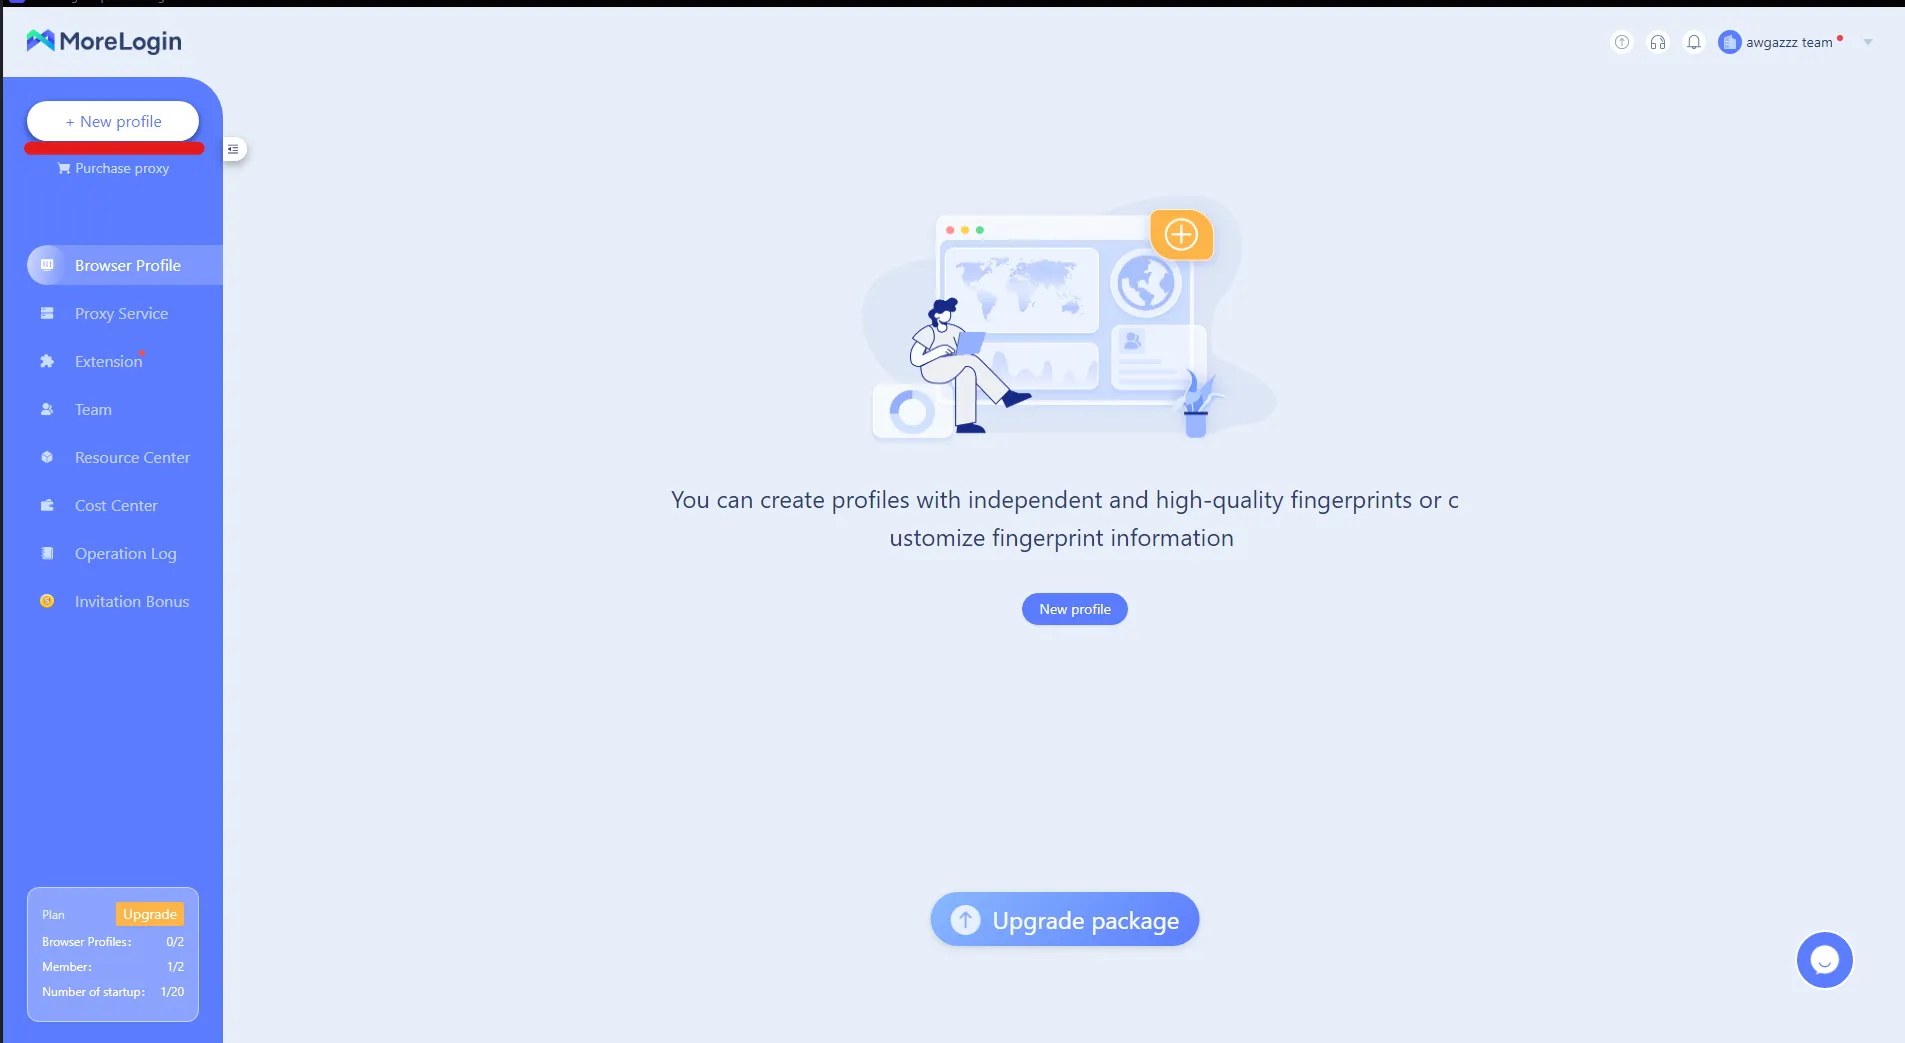
4. Click on "Advanced create" at the top options bar. Now you can choose the peripherals such as OS and browser you wish to be spoofed as. This step is crucial for creating a unique digital fingerprint.
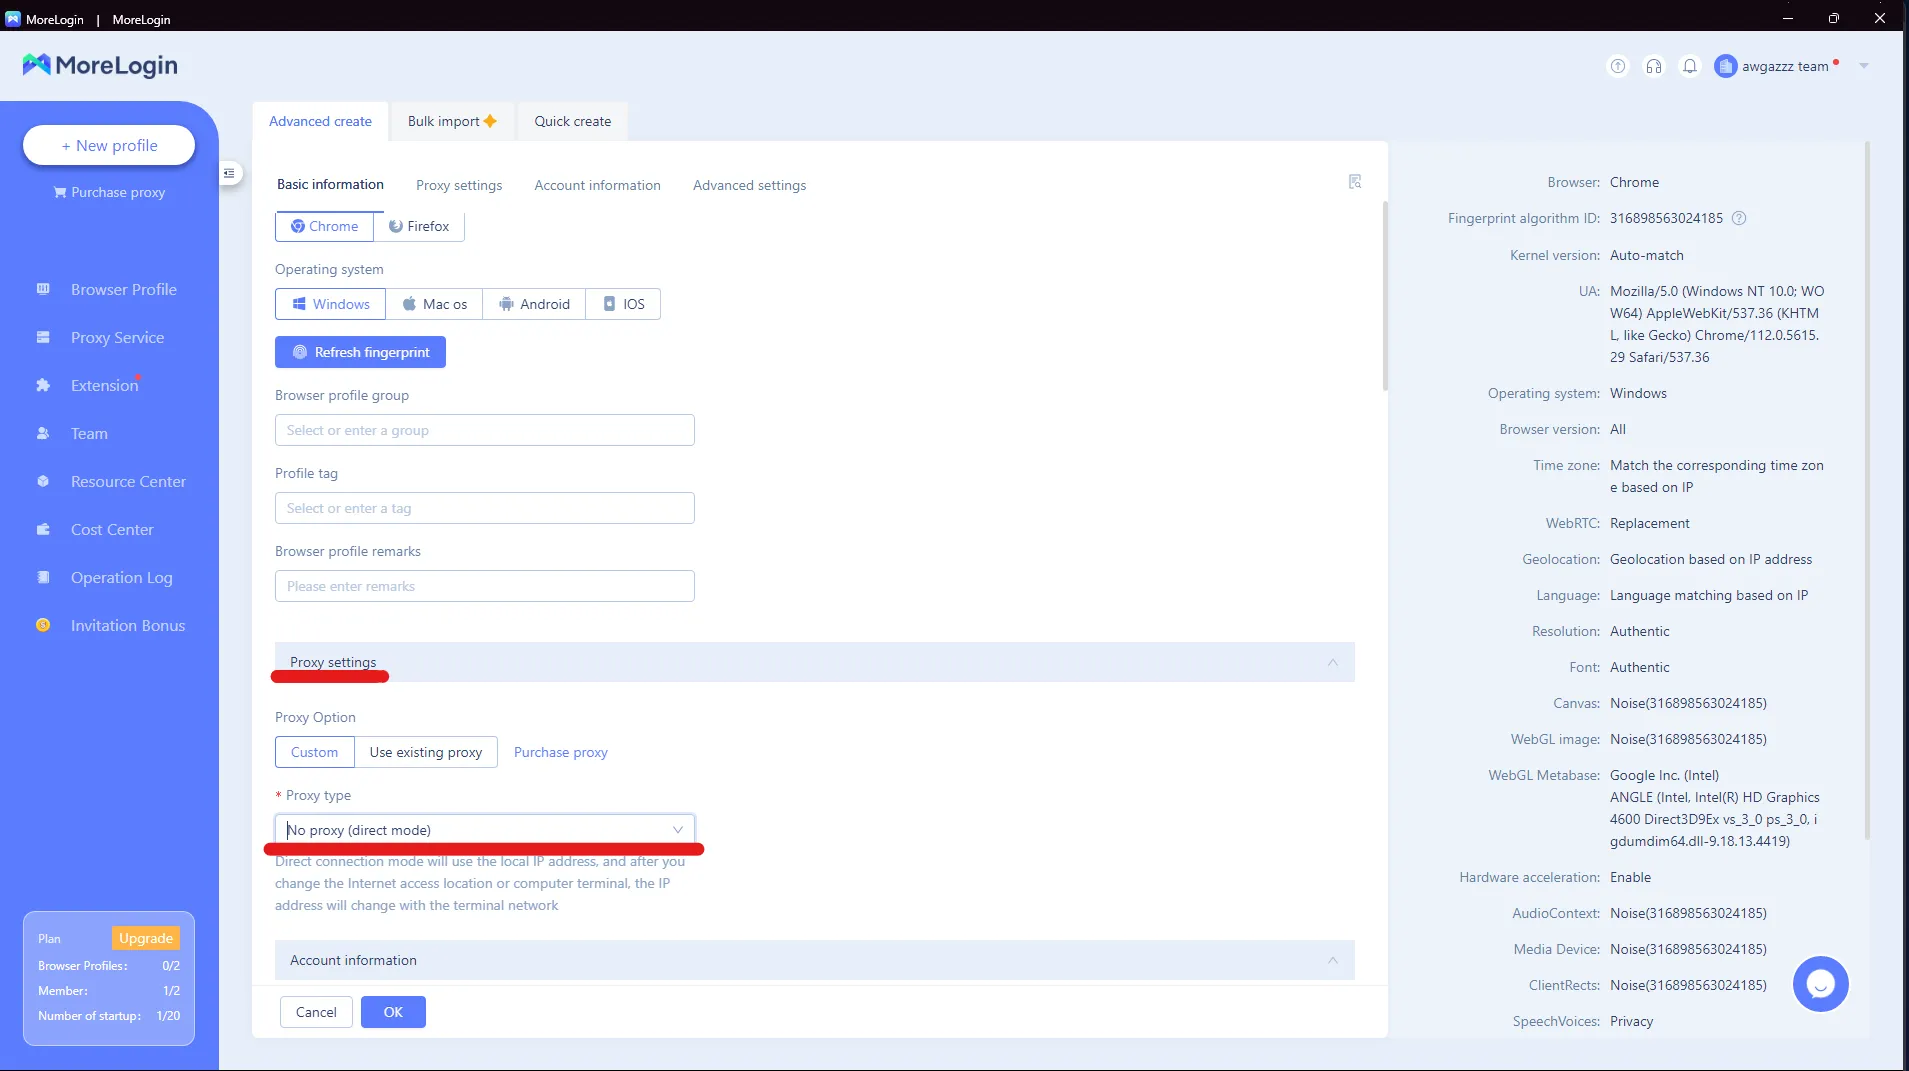
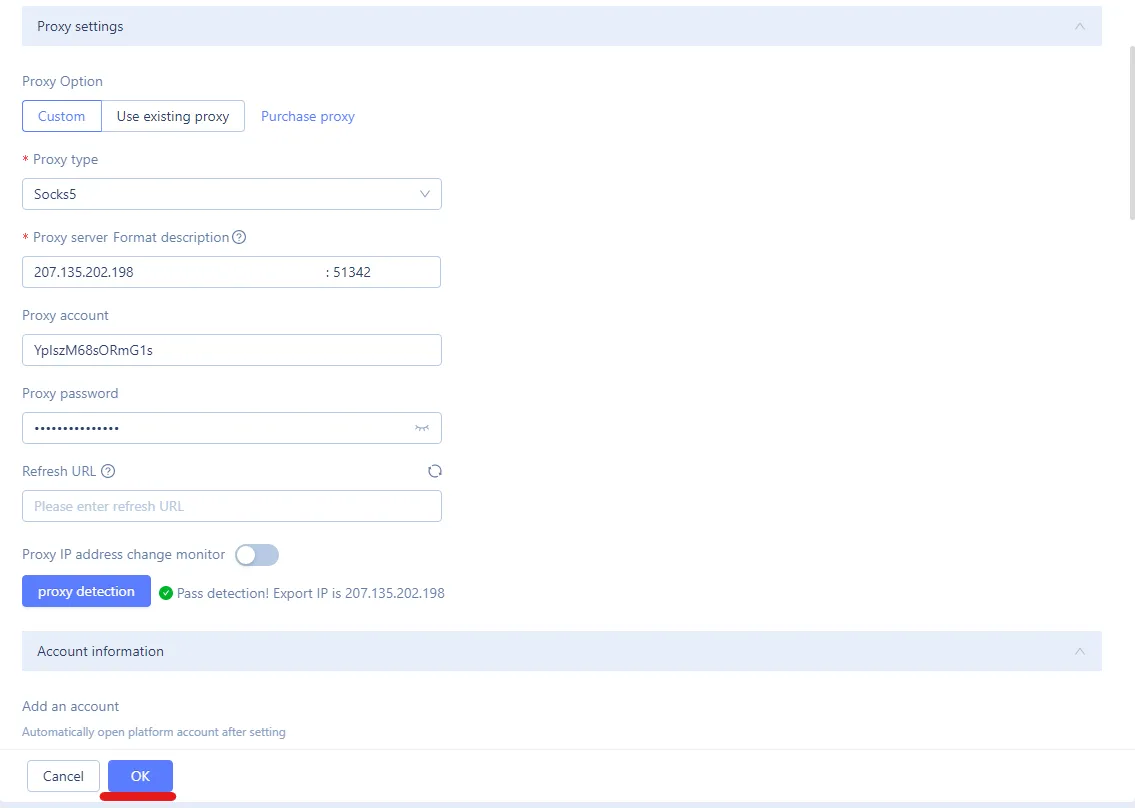
5. In proxy settings (right under basic information), select Proxy type HTTP or SOCKS5 according to the proxy you have. This step is essential for proper proxy endpoint configuration. This setup works the same for mobile proxies — they authenticate over HTTP(S) or SOCKS5 and plug right into MoreLogin.

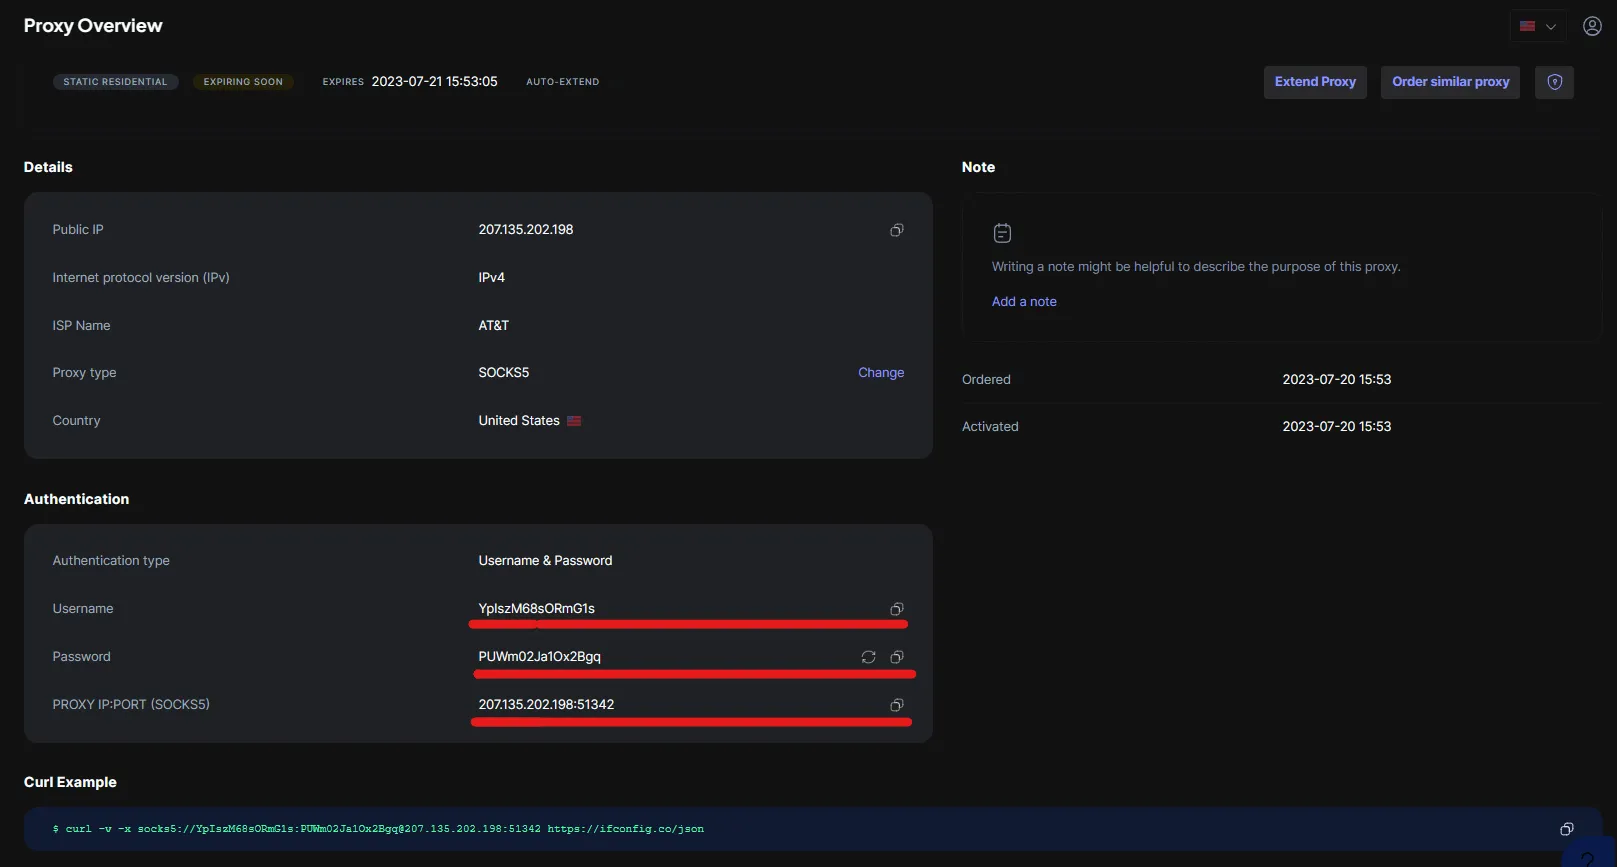
6. Copy your proxy credentials from Proxy-Cheap. To do this, click on your desired active proxy in the proxy overview and simply copy your credentials using the copy button. Please note to use the credentials you are assigned. The information in this post is just for tutorial purposes.

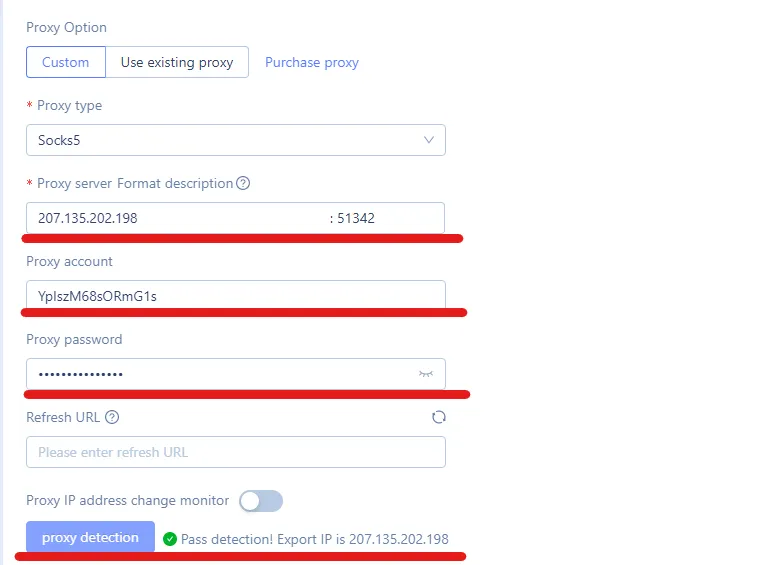
7. Paste your credentials into the browser settings after selecting the protocol. After inserting credentials, press the "Proxy detection" button at the bottom. If your connection is successful, you will see a sign of success. This step ensures proper proxy endpoint configuration for your browsing session.
8. Press OK at the bottom to save settings. You will be redirected to the main menu of the browser.
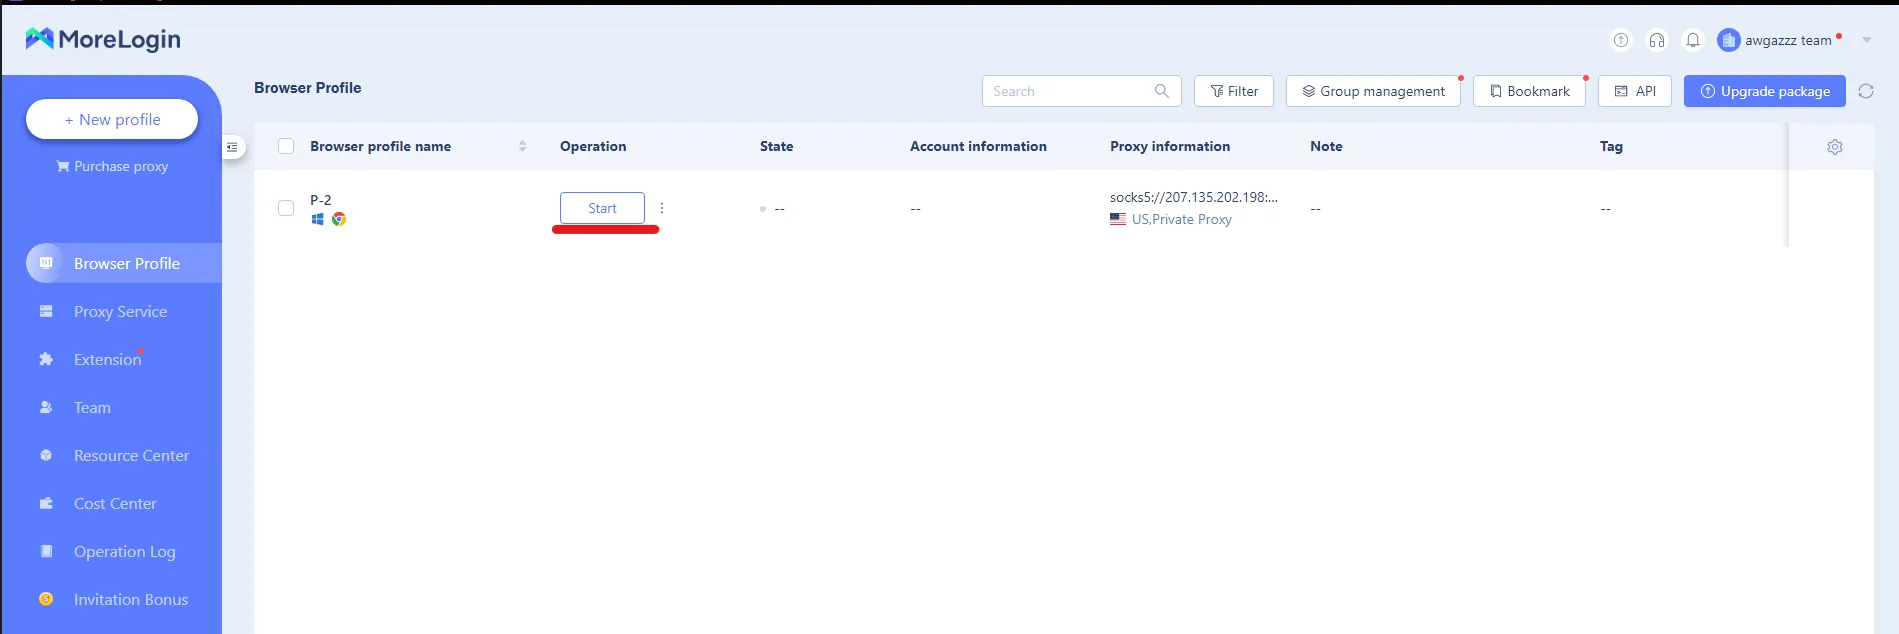
9. You will now see the proxy profile created. Press start, and the browser window will open. At this point, you can also adjust language settings to further customize your browsing experience.
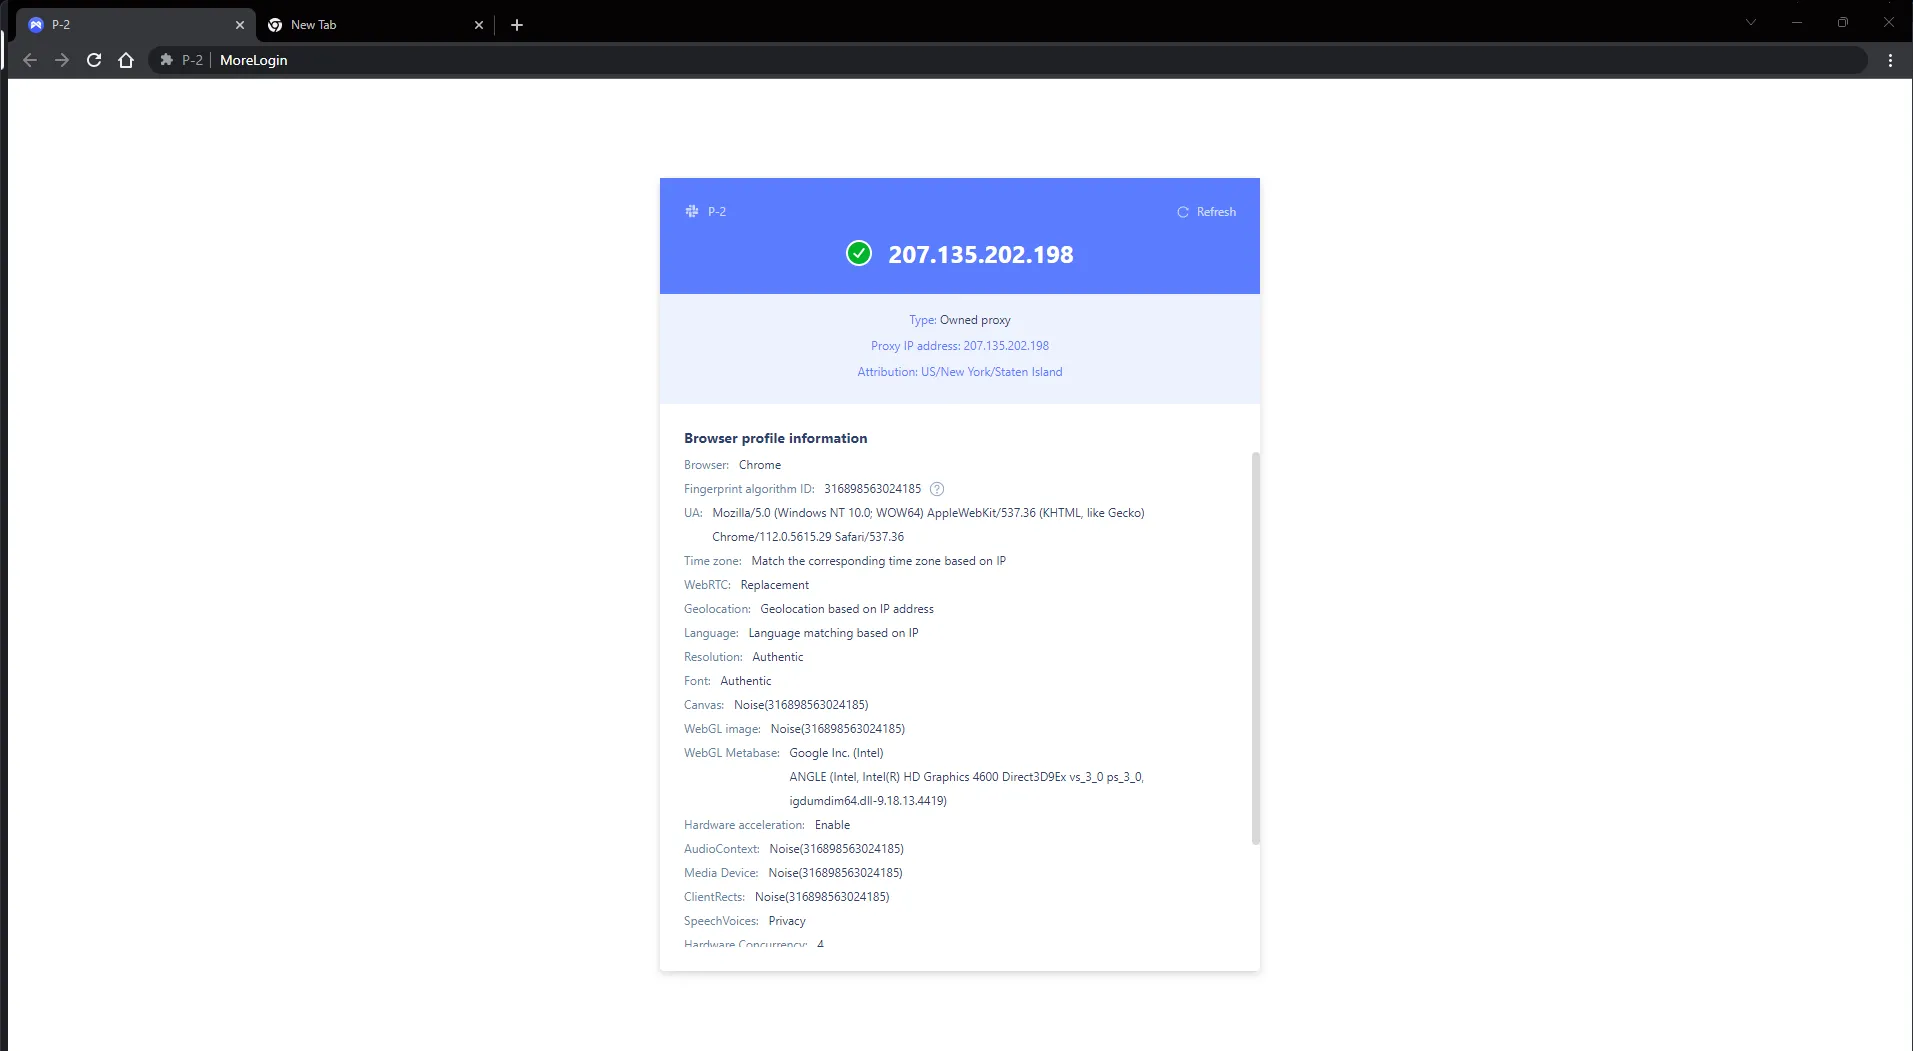
10. You are now connected to the internet with the proxy! You will be greeted with information about the proxy and other details about the browser and the settings you have chosen. Happy browsing!
The MoreLogin browser, combined with Proxy-Cheap's reliable proxies, opens up a world of possibilities for various online activities. Whether you're engaged in multi-accounting practices, bonus hunting, or need a secure environment for social media marketing and affiliate marketing, this setup provides the necessary tools. Additionally, for advanced users, the browser supports api automation integration, allowing for even more sophisticated operations like traffic arbitrage.
By masking your IP address and creating a unique digital fingerprint, you can navigate the web securely and efficiently, making the most of your online endeavors while maintaining privacy and avoiding account restrictions.