AdsPower is an antidetect browser and automation tool that prevents users from unauthorized fingerprinting. As a powerful proxy service, AdsPower lets users set differentiated fingerprints for multiple browser profiles. In this way, multi-account management on one device can be achieved, making it an ideal solution for managing multiple accounts and conducting various online activities.
AdsPower lets you have the best browsing experience by letting you surf the internet privately and get access to region-specific content or scrape for information with the help of our residential proxies or specialized captcha proxies to handle automation challenges.
The integration of AdsPower with Proxy Cheap's proxy network enhances your ability to manage multiple online identities securely.
1. Download and install AdsPower by clicking here
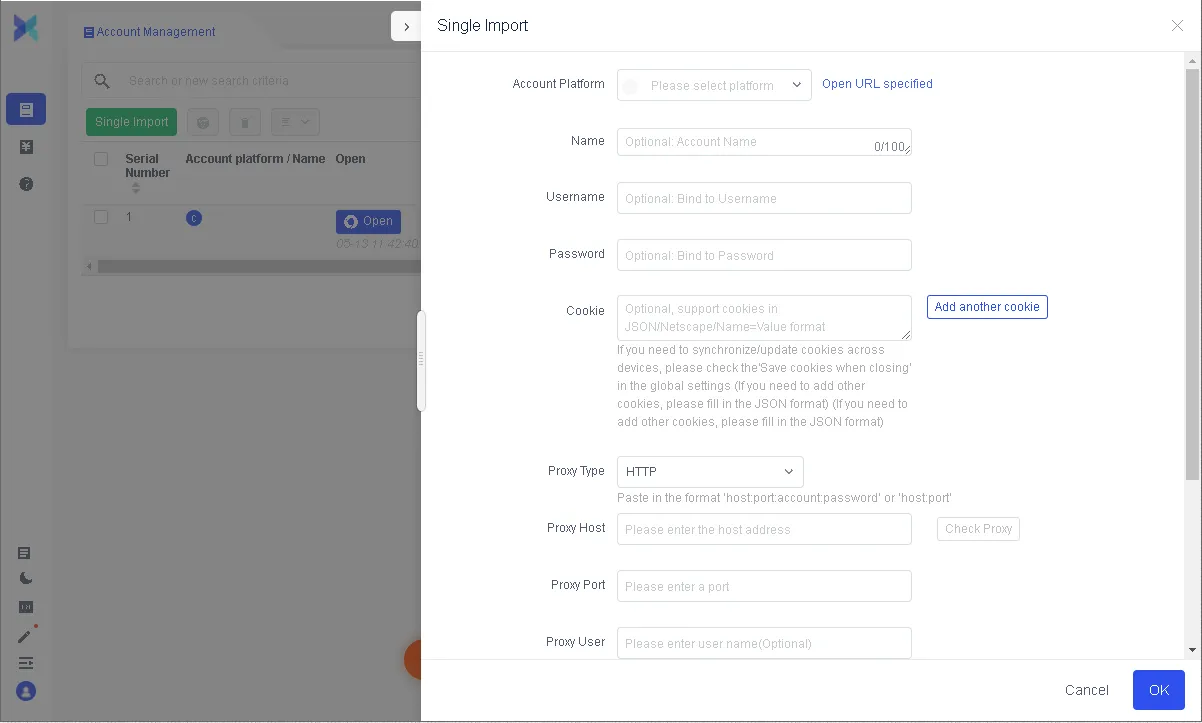
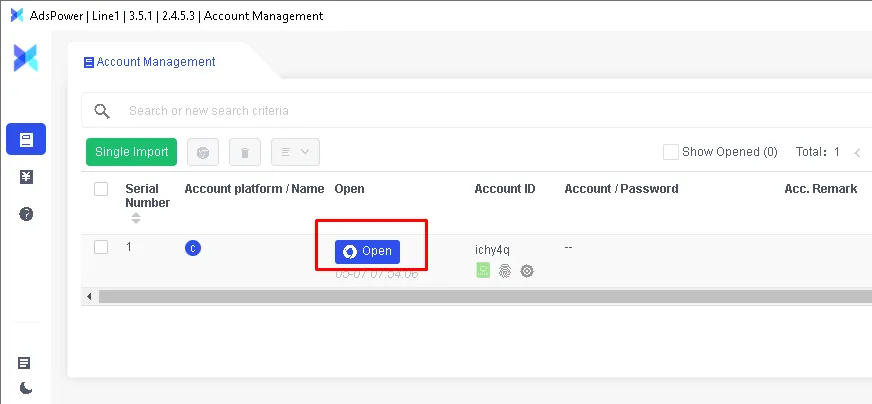
2. Open the software and click on Upload/Single Import.
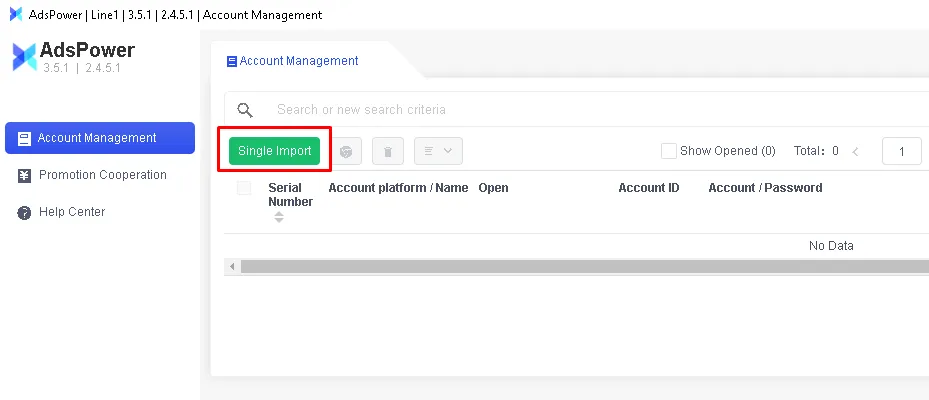
And it should pop a window like this
3. If you are using our dynamic residential proxies you will need to set up your generator first. If you are having problems, you can watch a tutorial here. After that, you will need to choose these options:
Proxy type – HTTP
Proxy host – proxy.proxy-cheap.com
Proxy port – 31112
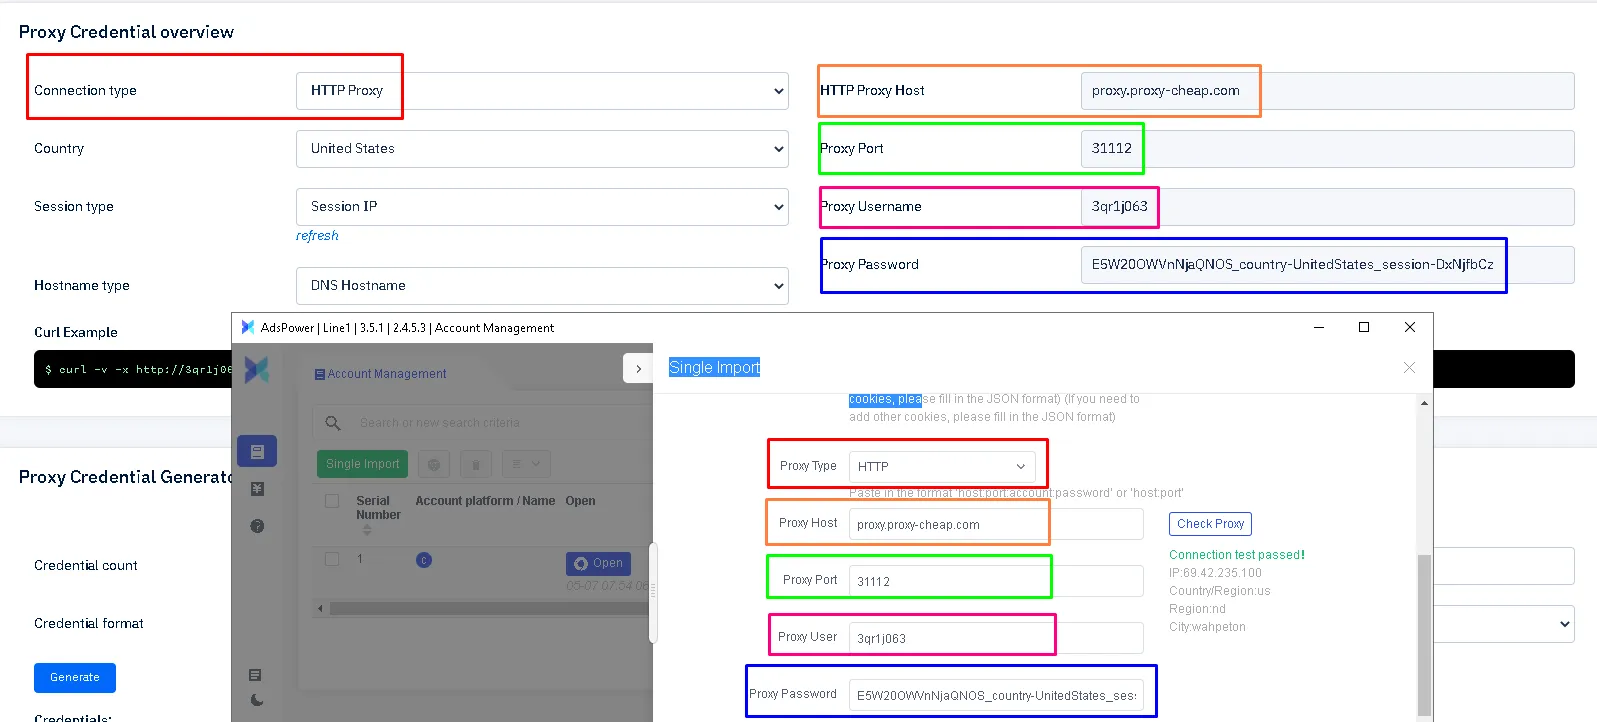
If by any chance you are using our static residential proxies, static mobile proxies, or ISP proxies, you will have an option to select HTTP/socks5. For these proxy types, you will have to input port 41112 for HTTP and 51112 for socks5 connections. Enter your login credentials: proxy username under Proxy User, and your password under Password. Residential proxy credentials can be different if using a different plan. By changing the country, your password will change too; the same applies to session type:

Random IP has an IP rotation on every request/refresh, while session control lets you have a static IP for at least 30 minutes. This feature is particularly useful when working with rotating residential proxies, allowing you to maintain consistent connections for specific tasks.
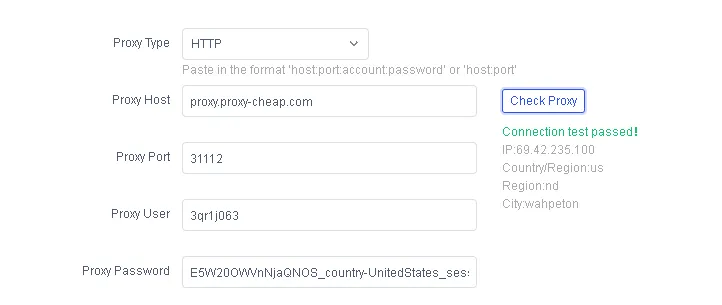
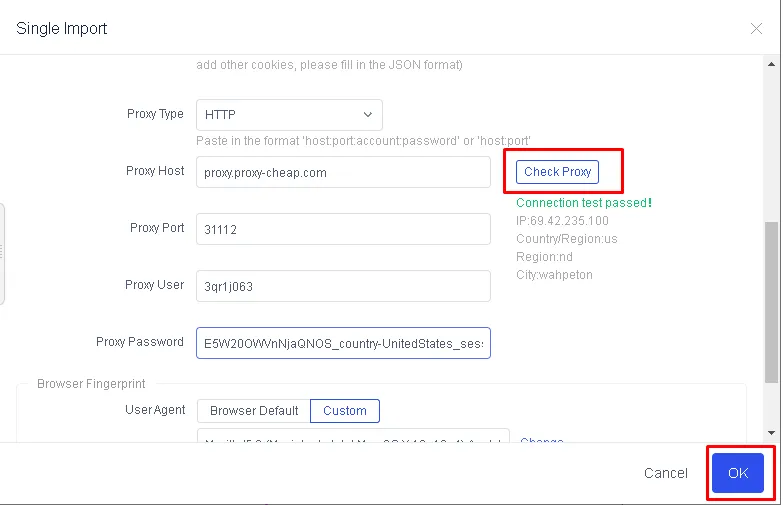
Once you are done typing down the credentials, click on "Check Proxy" and if the connection test passed, click the OK button.
Now you can just click on the "Open" button and start your work easily with Proxy Cheap's residential proxies.
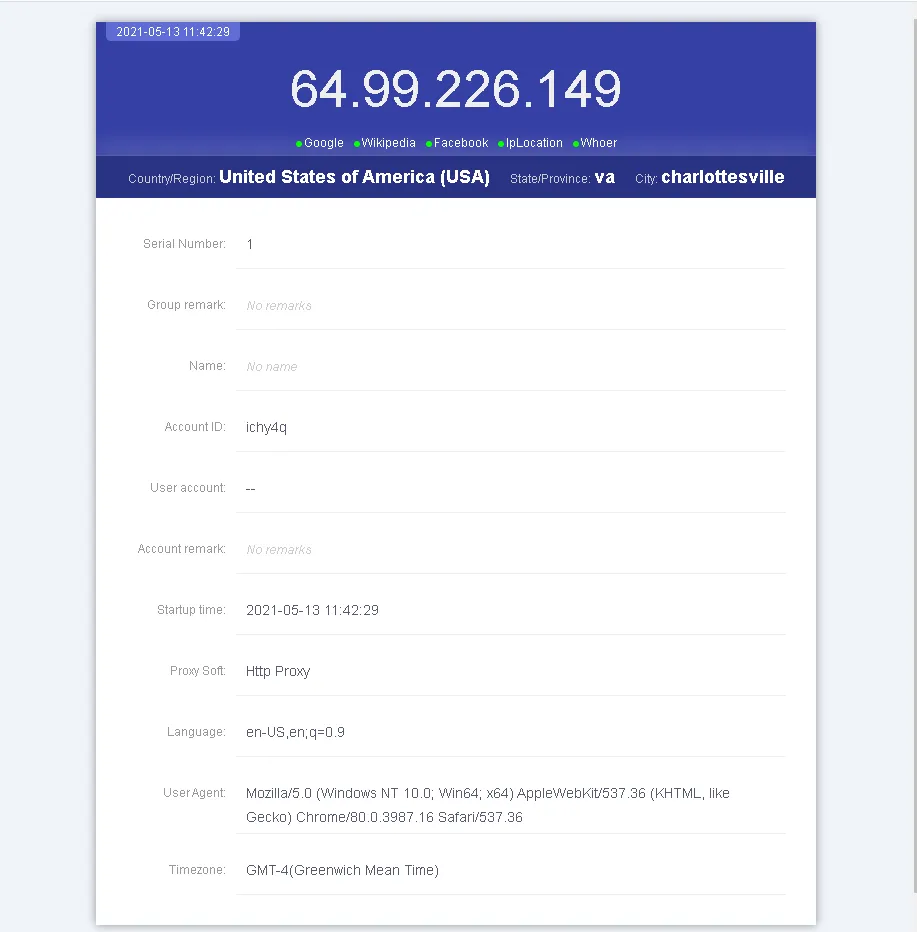
After opening, you should see a page like this:
Whether you're using dynamic or static residential proxies, Proxy Cheap as your proxy provider offers flexible options to suit your needs, making it one of the best cheap proxies solutions available. If you’re ready to buy proxy with credit card, Proxy-Cheap makes the process quick and secure. You can also buy proxy with paypal, giving you flexibility in payment methods.