You use a proxy with Python Requests by passing a proxies dictionary to your request and putting your proxy address in it, for example proxies={"http": "http://user:pass@host:port", "https": "http://user:pass@host:port"}.
In this guide you will learn:
What a proxy is and how it works with Python Requests
By the end, you will be able to plug a proxy into almost any Python Requests script in a safe and stable way.

A proxy is a server that sits between your code and the site you call. Your Python script talks to the proxy. The proxy then talks to the target site. The proxy server acts as an intermediary between your code and the target website, routing your web requests and keeping your real IP address private. The site does not see your real IP address; instead, it sees the proxy IP address. The proxy replaces your real IP address with the proxy IP address, so your actual IP address stays private from the target site.
If you are new to proxies, it can help to read a simple overview of what proxies are. In short, a proxy changes how your traffic looks from the outside by altering the IP address that websites see.
When you send a request with Python Requests, you usually connect directly to the target domain using your own IP address. When you use a proxy, Requests connects to the proxy IP address instead. The proxy then forwards your HTTP request for you. Many proxies can also keep your real IP address and some headers private. This is called a high-privacy proxy server.
Using a proxy with Requests gives you several benefits:
All of this is controlled by a small proxies dictionary in your code.
Before running the example below, make sure to install the Python Requests library using pip:
pip install requests
Here is the smallest working example of using a proxy with Python Requests:
import requests proxies = { "http": "http://user:password@proxy_host:proxy_port", "https": "http://user:password@proxy_host:proxy_port", } response = requests.get("https://httpbin.org/ip", proxies=proxies, timeout=10) print(response.json())
This script does the following:
If the output IP is different from your real IP, the proxy works.
The example above also shows the basic pattern that people search for as a “python proxy requests” snippet. Almost every proxy setup with Requests builds on this pattern.

The proxy URL has a clear format:
scheme://username:password@host:port
Each part means:
Some proxies do not need a username and password. In that case you can drop that part:
http://proxy_host:proxy_port
Always use the scheme your proxy provider gives you. If they say it is a SOCKS5 proxy, use socks5:// or socks5h:// in your proxy URL.
Correct proxy configuration is essential for successful connections.
Most HTTP proxies work with the basic proxies dictionary. Specifying the 'https' key in the proxies dictionary ensures that HTTPS protocols and HTTPS traffic are routed through the proxy, allowing secure connections.
import requests proxies = { "http": "http://user:password@proxy_host:proxy_port", "https": "http://user:password@proxy_host:proxy_port", } url = "https://example.com" response = requests.get(url, proxies=proxies, timeout=10) print(response.status_code)
When using requests.get, the proxies parameter is used to specify the proxy server details for both HTTP and HTTPS requests. Configuring proxies for HTTPS requests is important for secure data transfer, as it ensures that HTTPS traffic is properly routed through the proxy using HTTPS protocols.
Some tips for HTTP and HTTPS proxies:
If your proxy is only for HTTP and not HTTPS, you can set only the http key. Requests will then use your normal connection for HTTPS.

SOCKS proxies work at a lower level. They can handle more types of traffic, including different types of web requests, making them suitable for a variety of network tasks. To use them in Requests you need extra support.
First, install the extra package:
pip install "requests[socks]"
Then you can use a SOCKS proxy like this:
import requests proxies = { "http": "socks5h://user:password@proxy_host:proxy_port", "https": "socks5h://user:password@proxy_host:proxy_port", } response = requests.get("https://httpbin.org/ip", proxies=proxies, timeout=10) print(response.json())
The socks5h scheme tells Requests to resolve DNS through the proxy. This can help if the site rejects your DNS requests.
Most paid proxies require proxy authentication, meaning you must include your username and password in the proxy URL to access an authenticated proxy. With Python Requests, you typically provide the login details in the proxy URL as shown before. This is essential for proxies that require authentication.
proxies = { "http": "http://user123:strongpassword@proxy_host:proxy_port", "https": "http://user123:strongpassword@proxy_host:proxy_port", }
If your proxy uses IP whitelisting instead of username and password, then your code does not need to include credentials. The proxy will accept connections from your machine IP directly.
Some proxies rotate credentials or limit how long they are valid. If you encounter authentication errors (such as HTTP 407), it often means the proxy requires authentication and your credentials may be incorrect or expired. Always check that your username and password are up to date on your provider dashboard when using an authenticated proxy.
You can also configure proxies for Requests through environment variables. This can be useful in scripts that run on servers or in containers.
Requests understands these environment variables and relies on them to manage proxy configurations:
For example, setting these environment variables allows Requests to handle proxies automatically, including excluding certain hosts from using the proxy with NO_PROXY:
export HTTP_PROXY="http://user:password@proxy_host:proxy_port" export HTTPS_PROXY="http://user:password@proxy_host:proxy_port" export NO_PROXY="localhost,127.0.0.1"
Then you can use Requests without passing a proxies dictionary (proxies dict) in your code:
import requests response = requests.get("https://httpbin.org/ip", timeout=10) print(response.json())
Requests will read the proxy from the environment. This keeps your code clean and makes it easy to change the proxy without editing the script. Configuring proxies with Python Requests can be done either through environment variables as shown above, or by passing a proxies dictionary directly, depending on your use case for proxies with Python requests.
For larger projects it is better to use a Session object. A session lets you efficiently handle multiple requests while reusing the same TCP connection, cookies, and headers across many requests. By maintaining a persistent TCP connection, you improve performance and simplify managing authentication and cookies, especially when making multiple requests to the same server.
You can attach a proxy to the session like this:
import requests session = requests.Session() session.proxies.update({ "http": "http://user:password@proxy_host:proxy_port", "https": "http://user:password@proxy_host:proxy_port", }) session.headers.update({ "User-Agent": "Mozilla/5.0 (Windows NT 10.0; Win64; x64)" }) for page in range(1, 6): url = f"https://example.com/list?page={page}" response = session.get(url, timeout=10) print(page, response.status_code)
This approach is useful when scraping many pages from the same site. The proxy settings apply to every request made with that session, and the session will reuse the same TCP connection for better efficiency.
You can also override the proxy for a single request by passing proxies to that call. The per request proxies will take priority over the session level proxies.
When using Python Requests for web scraping, proxy rotation and using multiple proxies are key strategies to distribute requests, maintain stable sessions, and reduce IP-level rate limiting. By rotating through multiple IP addresses, you can improve reliability and reduce throttling, especially when making numerous requests or accessing region-specific content.
There are two common ways to achieve proxy rotation and manage multiple IP addresses with Python Requests:
For a deeper walkthrough of both methods you can follow this detailed guide for IP rotation in Python.
Here is a simple example that rotates through a list of proxies in code to distribute requests and avoid sending all traffic from a single IP:
import itertools import requests proxies_list = [ "http://user:pass@proxy1:8000", "http://user:pass@proxy2:8000", "http://user:pass@proxy3:8000", ] proxy_cycle = itertools.cycle(proxies_list) urls = [ "https://httpbin.org/ip", "https://example.com", "https://httpbin.org/headers", ] for url in urls: proxy = next(proxy_cycle) proxies = {"http": proxy, "https": proxy} try: response = requests.get(url, proxies=proxies, timeout=10) print(url, response.status_code) except requests.RequestException as exc: print(url, "failed with", exc)
For handling numerous requests or large-scale scraping projects, premium proxies are recommended. Premium proxies offer better reliability, automatic proxy rotation, geolocation targeting, and higher success rates compared to free options.
In real scraping setups you will also add random delays, random headers, and smarter retry logic. The important part is that you do not send hundreds of calls from a single IP in a short time.
When working with proxies it is normal to see some errors. Robust error handling is essential for managing proxy failures and maintaining reliable scripts. The key is to handle them in code and know when the problem is in your script, in the proxy, or on the target site.
Common problems include:
To understand why these happen, it can help to read more about what a proxy error is.
Here is a robust pattern to wrap your request in retries and handle basic proxy issues with proper error handling:
import time import requests proxies = { "http": "http://user:password@proxy_host:proxy_port", "https": "http://user:password@proxy_host:proxy_port", } url = "https://example.com" max_retries = 3 for attempt in range(1, max_retries + 1): try: response = requests.get(url, proxies=proxies, timeout=10) if response.status_code in (403, 429): print("Blocked or rate limited, status:", response.status_code) # 429 means too many requests; consider rotating proxies or reducing request frequency time.sleep(5) continue response.raise_for_status() print("Success on attempt", attempt) break except requests.exceptions.ProxyError as exc: print("Proxy error on attempt", attempt, exc) time.sleep(2) except requests.exceptions.RequestException as exc: print("Request failed on attempt", attempt, exc) time.sleep(2)
This example:
In a production script you might also log failures and switch to a new proxy after a number of errors.
Most teams do not use only Python. You might debug with curl or use wget in a cron job. It is best if your proxy setup is similar across tools. Selecting the right proxy proxies is important for consistent performance, reliability, and security across different tools like Requests, curl, and wget.
For curl, you can follow this guide on how to use curl with a proxy. The same proxy URL you use in Requests will usually work with curl.
If you also automate downloads from the command line, you can keep settings aligned by reading about wget with proxy. Using the same proxy details in all tools makes debugging much easier.
Once you confirm that the proxy works in curl or wget, you can plug the same URL into your Python Requests proxies dictionary with more confidence.
Many browser automation flows use both Selenium and Requests in the same project. For example, you might log in with Selenium and then scrape data with Requests using the same proxy.
To set this up, first make sure your browser automation uses a proxy. You can follow a detailed Selenium proxy server guide for this part.
Then, in your Python code, reuse the same proxy URL for Requests:
proxy_url = "http://user:password@proxy_host:proxy_port" selenium_proxy = proxy_url # used in your Selenium options requests_proxies = { "http": proxy_url, "https": proxy_url, }
Consistent proxy configuration across both Selenium and Requests helps maintain privacy and keep sessions stable and reliable. With this approach your real IP stays private for both browser and raw HTTP calls. It also keeps your network behavior consistent across tools, which helps maintain stable, reliable sessions.
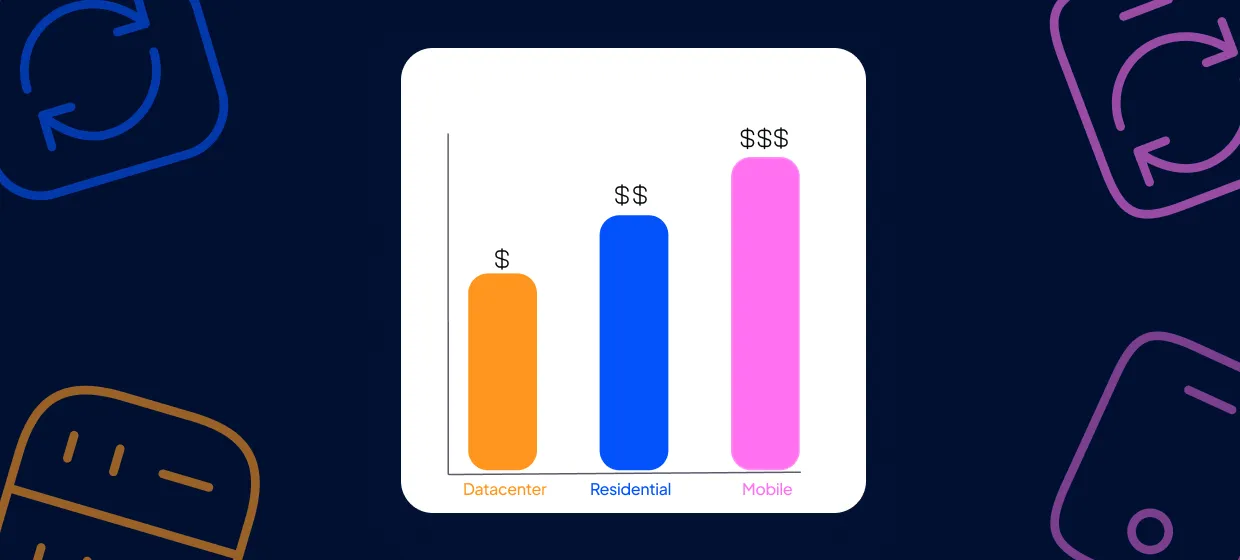
Different projects need different proxy types. Here are some common types and when they fit Requests based workflows.
If you work with strict sites or need your traffic to match typical end-user environments, residential proxies are usually the safest choice. They pair well with Python Requests because you can rotate IPs and spread load across many real residential connections.
When choosing a proxy provider, prioritize reliable proxies to ensure your requests succeed, maintain data security, and keep sessions stable during web scraping or data collection.
Think about:
Your answers will guide the proxy type and rotation strategy.
When working with proxies in your Python Requests scripts, the performance of your proxy server can make or break your web scraping tasks. Speed, latency, and reliability are critical factors that directly impact how efficiently you can collect data, avoid IP bans, and maintain stable connections.
When you send traffic through a proxy, that proxy can see your requests. Treat your proxy like any other part of your infrastructure and follow security best practices.
Basic guidelines:
Also, use proxies in an ethical way:
Proxies and Python Requests are powerful tools. Use them responsibly so your projects stay safe and sustainable.

At first, a single proxy in a simple proxies dictionary may be enough. Over time, you may notice more failed requests, more captchas, or more timeouts. This is a sign that your proxy and request logic should grow with your project.
You might need to:
Python Requests gives you a simple API that still works well as you scale. You can wrap it in your own helper functions, control concurrency with threads or async wrappers, and plug it into larger scraping or automation systems.
If you want stable, easy to use proxies for your Python Requests scripts, python's requests library makes it easy to integrate proxies into your scripts. The requests library is widely used for automating web interactions and managing proxy settings, making it a popular choice for web scraping and maintaining reliable connectivity. It helps to use a provider that gives clear proxy formats, strong uptime, and a simple dashboard. You can start today by creating an account at Proxy-Cheap and connecting one of their endpoints to the proxies dictionary examples shown in this guide.