Location restrictions blocking you from websites? Curl proxy solutions are a great way to get past these barriers and keep your online privacy intact.
cURL (Client URL) stands as a robust command-line tool that transfers data through HTTP, HTTPS, FTP, and several other protocols. The tool becomes more powerful when paired with proxies that serve as middlemen between your computer and destination servers. On top of that, it boosts security, speeds up performance, and adds more capabilities to your HTTP requests.
You might be a developer testing geo-restricted APIs, a system admin handling network requests, or someone who needs access to region-locked content. Learning cURL with proxies will prove incredibly valuable. This piece covers everything from simple setup to complex configurations that help you apply curl proxy settings in your projects effectively.
Let's make sure cURL is set up on your system before we start using it with proxies. Many operating systems come with cURL already installed, but you might need to set it up yourself sometimes.
You should first check if cURL exists on your system. Open your command-line interface (Terminal on macOS/Linux or Command Prompt on Windows) and type:
curl --version
This command shows you the installed version and lists all supported protocols and features. A successful installation displays output like:
curl 7.88.1 (x86_64-pc-linux-gnu) libcurl/7.88.1 OpenSSL/3.0.11...
You'll need to install cURL if you see "command not found".
Windows 10 (version 1803 or later) and Windows 11 users will find cURL pre-installed in C:\Windows\System32. Older versions might need installation, and here are your options:
choco install curl with administrator rightsOpen a new command prompt and run curl --version to confirm installation.
Your Mac likely has cURL installed. All the same, here's how to get or update to the latest version:
ruby -e "$(curl -fsSL https://raw.githubusercontent.com/Homebrew/install/master/install)" < /dev/null 2> /dev/null
brew install curl
echo 'export PATH="$(brew --prefix)/opt/curl/bin:$PATH"' >> ~/.zshrc
source ~/.zshrc
This setup gives you both the curl command-line tool and libcurl with its headers - great for development work.
Each Linux distribution has its own installation method:
Ubuntu/Debian:
sudo apt update
sudo apt install curl
RHEL/CentOS/Fedora:
sudo yum install curl
OpenSUSE:
sudo zypper install curl
Arch Linux:
sudo pacman -Sy curl
Check your Linux installation with:
curl --version
You can also try:
dpkg -l | grep curl    # For Debian-based systems
rpm -qa | grep curl    # For RPM-based systems
A proper cURL installation sets you up for proxy configuration. The setup process is simple on most systems, though each platform works a bit differently. These platform differences matter because they affect how you'll handle proxy configurations later.
The latest version of cURL works best with modern protocols and security features - something you'll appreciate when working with proxy connections.
Setting up a proxy connection with cURL needs specific information and configurations. The right setup is vital to route your requests through proxy servers.
Your proxy provider must give you several pieces of information to configure cURL:
proxy.example.com) or an IP address (93.16.238.41). Square brackets must enclose IPv6 addresses.These details help you build your proxy URL in this format:
<protocol>://<username>:<password>@<host>:<port>
Here's an example with HTTP protocol, host 71.103.203.109, port 9321, username admin-32458, and password rTuJ3tEwf:
http://admin-32458:[email protected]:9321
cURL provides strong support for proxies of all types, which makes it adaptable to different network setups:
HTTP and HTTPS Proxies: Web requests commonly use these protocols. HTTP proxies handle simple web browsing, while HTTPS proxies process encrypted traffic.
SOCKS Proxies: cURL supports both SOCKS4 and SOCKS5 protocols (see SOCKS5 proxies). These proxies can handle more protocols beyond HTTP, including FTP and SMTP.
Your cURL command can use these syntax variations:
http://proxy.example.com:8080 - For HTTP proxieshttps://proxy.example.com:8443 - For HTTPS proxiessocks4://proxy.example.com:1080 - For SOCKS4 proxiessocks4a://proxy.example.com:1080 - For SOCKS4 with proxy's name resolvingsocks5://proxy.example.com:1080 - For SOCKS5 proxiessocks5h://proxy.example.com:1080 - For SOCKS5 with proxy's name resolvingcURL requires explicit proxy configuration as it doesn't detect proxy settings automatically.
Proxy servers often use authentication to control access. You need authentication in these cases:
The proxy authentication methods cURL supports include:
-U username:password or --proxy-user username:password--proxy-digest flag--proxy-ntlm--proxy-negotiateThe --proxy-anyauth option lets cURL pick and use the right authentication method if you're unsure about your proxy's requirements.
This example shows simple proxy authentication:
curl -U daniel:secr3t -x myproxy:80 http://example.com
For NTLM authentication:
curl -U daniel:secr3t -x myproxy:80 http://example.com --proxy-ntlm
A good grasp of these proxy requirements ensures your cURL commands work well with intermediary servers.
Let's implement proxies with cURL now that we understand the requirements. Each proxy type needs specific syntax to work with your requests.
HTTP proxies are the most common type and cURL uses them as the default proxy protocol. You can use an HTTP proxy by specifying the host and port:
curl -x http://proxy.example.com:8080 http://example.com/
The protocol prefix changes for HTTPS proxies:
curl -x https://proxy.example.com:8443 https://example.com/
cURL creates a secure connection to the proxy itself with HTTPS proxies. This sets up an encrypted tunnel between you and the proxy, separate from your connection to the target server.
You can add authentication to your HTTP proxy this way:
curl -x http://username:[email protected]:8080 http://example.com/
SOCKS proxies give you more versatile tunneling options than HTTP proxies. The main difference between SOCKS versions shows in their DNS resolution handling.
SOCKS4 lets clients resolve hostnames locally:
curl -x socks4://proxy.example.com:1080 http://example.com/
SOCKS4a allows proxies to resolve hostnames:
curl -x socks4a://proxy.example.com:1080 http://example.com/
SOCKS5 works with both IPv4 and IPv6 addresses and provides better authentication options:
curl -x socks5://proxy.example.com:1080 http://example.com/
SOCKS5 with proxy-side hostname resolution helps prevent DNS leaks:
curl -x socks5h://proxy.example.com:1080 http://example.com/
The -x and --proxy flags work the same way in cURL. Both take the complete proxy URL with protocol, authentication, host, and port:
curl -x socks5://user:[email protected]:1080 http://example.com/
This matches:
curl --proxy socks5://user:[email protected]:1080 http://example.com/
You can also use protocol-specific flags like --socks5 and add authentication separately:
curl --socks5 proxy.example.com:1080 http://example.com/ --proxy-user username:password
SSL certificate validation errors might pop up with HTTPS proxy connections. This usually happens in two cases:
You can skip target website certificate checks:
curl -x http://proxy.example.com:8080 -k https://example.com/
The -k (or --insecure) flag tells cURL to skip the target site's SSL certificate verification.
Proxy certificate issues need the --proxy-insecure flag:
curl --proxy https://proxy.example.com:8443 --proxy-insecure https://example.com/
Corporate environments with intercepting proxies that use their own certificates might need both flags:
curl -x https://proxy.example.com:8443 -k --proxy-insecure https://example.com/
Be aware that skipping certificate checks makes your connection vulnerable to man-in-the-middle attacks.
You can save time and avoid errors by configuring cURL to use proxies persistently rather than specifying proxy settings with each command. This approach works great for developers who use the same proxy settings frequently.
Environment variables are the quickest way to set up persistent proxy configurations. These variables let cURL know which proxy to use for specific protocols:
export http_proxy=http://username:password@proxy_ip:proxy_port
export https_proxy=https://username:password@proxy_ip:proxy_port
cURL automatically routes requests through the specified proxy once these variables are set. Windows users need to use the set command instead of export:
set http_proxy=http://username:password@proxy_ip:proxy_port
set https_proxy=https://username:password@proxy_ip:proxy_port
ALL_PROXY can set a proxy for all protocols. The protocol-specific variables take precedence when both types are defined.
The NO_PROXY variable helps exclude certain hosts from proxy routing with a comma-separated list of hostnames:
export NO_PROXY="localhost,127.0.0.1,.example.com"
These settings become permanent when you add them to your shell profile file like ~/.profile or ~/.bashrc.
The .curlrc file gives you another great way to set persistent proxy settings that only affect cURL without impacting other applications. cURL looks for this configuration file automatically when it starts.
Linux and macOS users should create a .curlrc file in their home directory:
cd ~
nano .curlrc
Windows users need to create a _curlrc file (note the underscore) in their %APPDATA% directory. You can find this location by typing echo %APPDATA% in Command Prompt.
Add your proxy configuration using this syntax:
proxy = http://username:password@proxy_ip:proxy_port
You can also separate credentials and proxy address:
proxy-user = "username:password"
proxy = "proxy_ip:proxy_port"
Linux and macOS users might want to create aliases in their .bashrc file to quickly toggle proxy settings:
alias proxyon="export http_proxy='http://user:password@proxy_server:port'; export https_proxy='http://user:password@proxy_server:port'"
alias proxyoff="unset http_proxy; unset https_proxy"
Reload your configuration with source ~/.bashrc after adding these lines. Then just type proxyon or proxyoff to enable or disable the proxy.
Windows users in corporate environments with strict proxy requirements should think about creating batch files that set and unset proxies for different scenarios.
Environment variables and the .curlrc file each have their place - environment variables work system-wide in your current session, while .curlrc affects only cURL commands regardless of your terminal or session.
Getting skilled at cURL with proxies requires more than simple configurations. Let's explore advanced techniques and solutions to common challenges.
You might need to bypass proxy settings for certain domains or requests. The --noproxy option works perfectly:
curl --noproxy example.com http://example.com
A single command can bypass proxy settings completely for all domains:
curl --noproxy "*" http://example.com
This method works great for accessing internal resources while maintaining your proxy setup for external requests.
Switching between proxy and direct connections becomes routine as you gain experience. These time-saving aliases in your .bashrc file make it easier:
alias proxyon="export http_proxy='http://user:[email protected]:1234';export https_proxy='http://user:[email protected]:1234'"
alias proxyoff="unset http_proxy;unset https_proxy"
Run source ~/.bashrc after adding these lines. You can then type proxyon or proxyoff to enable or disable proxy settings.
Understanding these common errors helps troubleshoot proxy issues with cURL:
-k or --insecure flag (use cautiously)Add the -v (verbose) flag to your command for detailed debugging:
curl -x http://proxy:port -v https://example.com
Rotating proxies helps avoid rate limiting and IP blocks during web scraping projects. This simple bash script selects randomly from a proxy list:
#!/bin/bash
proxies=("http://proxy1:8080" "http://proxy2:8080" "http://proxy3:8080")
proxy=${proxies[$RANDOM % ${#proxies[@]}]}
curl -x $proxy https://example.com
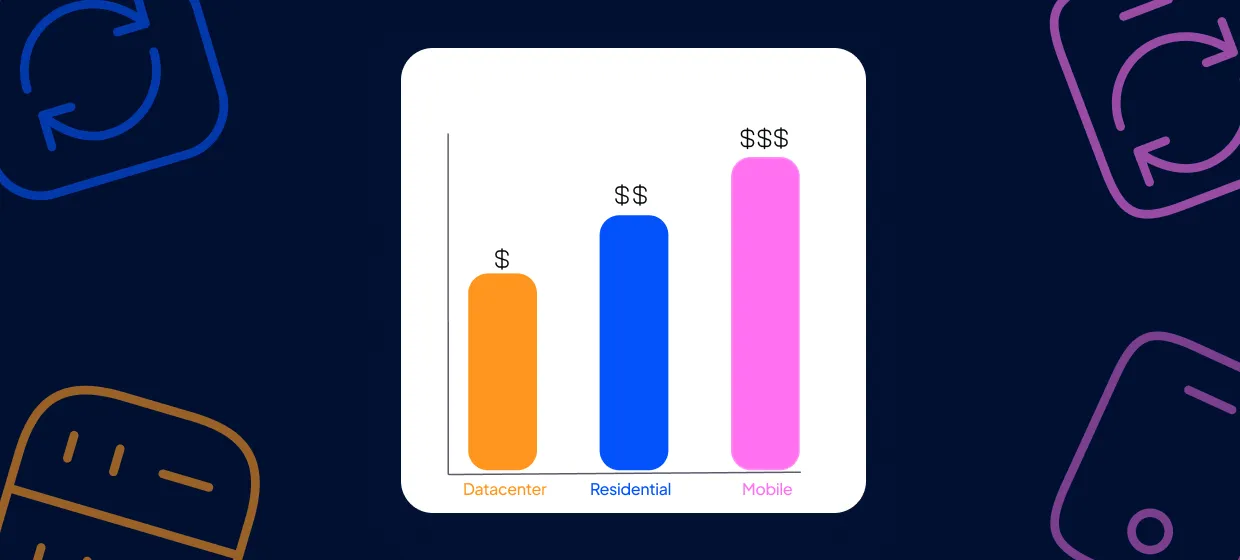
Residential proxies work better than datacenter IPs because websites see them as genuine user traffic.
Learning to use cURL with proxies will expand your capabilities as a developer or system administrator. This piece walks you through everything from installation to advanced proxy implementation techniques for platforms of all types.
You'll start by checking if cURL is installed on your Windows, macOS, or Linux system. The next step covers proxy requirements - server addresses, port numbers, protocols, and authentication credentials from your proxy provider.
The practical examples show how to use different proxy types properly. HTTP and HTTPS proxies work well with web traffic, while SOCKS4 and SOCKS5 protocols give you more flexibility with multiple connection types. The guide also helps you handle SSL certificate problems that often pop up during proxy usage.
Setting up persistent configurations saves time if you use proxies regularly. System-wide settings come from environment variables, and the .curlrc file lets you configure cURL without affecting other apps. You can pick what works best for your needs.
The advanced section gives you tools for troubleshooting and specialized tasks like proxy rotation for web scraping. These help you tackle common issues such as authentication errors, timeouts, and rate limiting.
This knowledge lets you confidently add proxies to your cURL commands for better privacy, security, and access to geo-restricted content. Note that practice makes perfect - start simple and try more advanced features as you get comfortable.
To use a proxy with cURL, use the -x or --proxy option followed by the proxy server URL. For example: curl -x http://proxy.example.com:8080 https://target-website.com
Yes, cURL supports various proxy types including HTTP, HTTPS, SOCKS4, and SOCKS5. You can specify the proxy type in your command, such as -x socks5://proxy.example.com:1080 for a SOCKS5 proxy.
You can set persistent proxy settings using environment variables (e.g., export http_proxy=http://proxy.example.com:8080) or by creating a .curlrc configuration file in your home directory with the proxy settings.
For SSL certificate issues, you can use the -k or --insecure flag to bypass certificate verification. However, use this option cautiously as it reduces security. For proxy-specific SSL issues, use the --proxy-insecure flag.
To troubleshoot proxy issues, use the -v (verbose) flag in your cURL command for detailed output. This will help identify connection problems, authentication errors, or other issues. Also, verify your proxy credentials and settings are correct.