You configure proxy settings in Postman from Settings > Proxy, where you can enable a global proxy for all requests or use the built in proxy to capture traffic from your browser or device.
Postman sends HTTP and HTTPS requests to APIs and web servers. When you add a proxy, Postman stops talking to the target server directly. Instead, it sends every request to a proxy server.
The proxy server then forwards your request to the final destination and returns the response to Postman. The proxy acts as an intermediary between the client application (Postman) and the destination server, serving as a security barrier that can filter or log traffic.
This gives you more control over:
With the right setup, you can test APIs from different locations, protect your real IP, and inspect all traffic in one place.
Here is the fastest way to start using a proxy in Postman Desktop:
Note: Make sure to select the correct proxy type (such as HTTP, HTTPS, or SOCKS5) based on your proxy service. Choosing the right proxy type is essential for proper connectivity.
7. If your proxy uses a username and password, enable authentication and fill in the credentials.
8. Click “Save” or close the settings window.
From this moment, every request you send from Postman will go through that proxy, as long as global proxy is enabled.

You will benefit from Postman proxy settings when:
Postman does not provide the proxy server itself. You bring your own proxy and Postman routes traffic through it.
Postman can work with several proxy types, as long as they support HTTP and HTTPS traffic.
Common options include:
When setting up a proxy, you will typically need the proxy server address, port, and sometimes a proxy username and password for authentication, depending on the proxy type.
For most API work, you will use either HTTP or HTTPS style proxies. SOCKS5 proxies (socks proxy) are useful when you need more flexibility, such as routing non HTTP traffic through the same server.
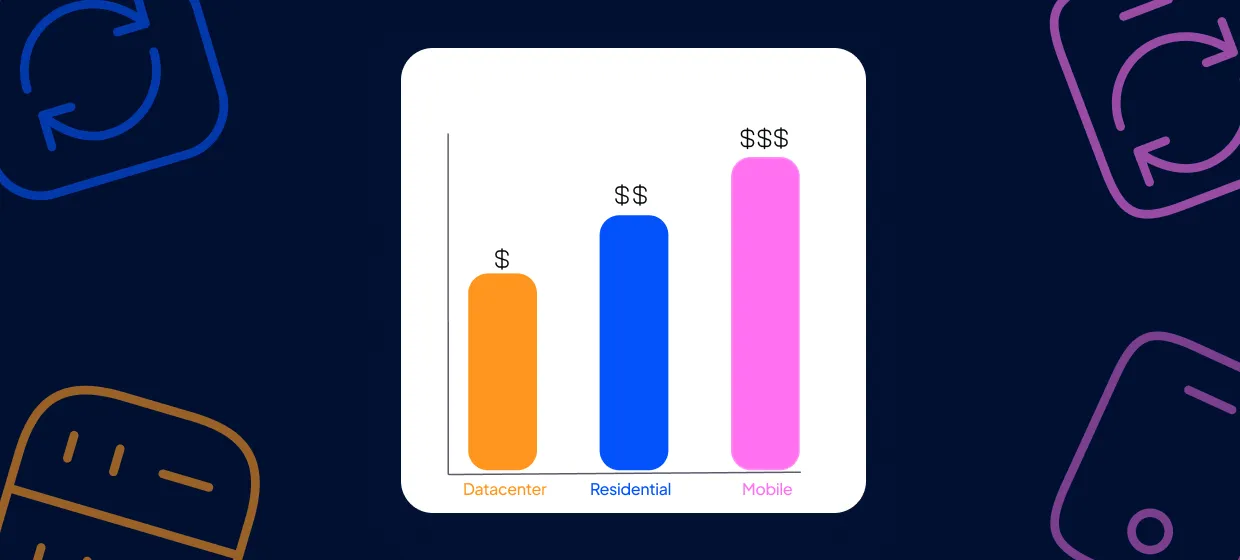
For many testing and data collection tasks, high quality residential proxies give you IPs that match real home user environments instead of servers or data centers. You can learn more about this option on the residential proxies page.

There are two main Postman environments:
On the desktop app, Postman controls its own proxy settings. It can use:
You can manage all proxy options directly in Postman's settings, including enabling the system proxy, setting up authentication, and configuring environment-specific proxies.
On the web version, your browser and operating system control most of the outgoing traffic. In this case you usually:
For deep control and easier debugging, the desktop app is the better choice because it has full proxy configuration inside the app.
If your company already routes all traffic through a gateway, or if you run a local proxy client, you can tell Postman to inherit that setup by using your system proxy settings.
To use the system proxy in Postman Desktop:
Enabling the 'network proxy option' in your operating system will affect Postman's system proxy settings. When 'Use system proxy' is enabled, Postman will use the default proxy configuration from your system, inheriting proxy details directly from your OS.
Postman will then use whatever proxy your operating system is using. On Windows, this is the proxy you set in the system network settings.
If you are not sure how to configure that first, follow a detailed Windows 11/10 proxy setup guide so your entire system uses the right proxy before you enable “Use system proxy” in Postman.
A global proxy is a proxy that Postman uses for every request, no matter what collection or workspace you are in. Setting up a custom proxy in Postman gives you more control over how your requests are routed, allowing you to tailor your connection for specific needs.
To configure a custom proxy configuration:
You can adjust these custom proxy settings for different use cases, such as testing APIs from different regions, increasing security, or routing through region-specific IPs to maintain stable, reliable sessions.
After this, send a simple GET request to a test URL, such as a public IP echo service, to confirm that your IP now matches the proxy.

Most paid proxies require a username and password. If your proxy requires authentication, you must enable the 'proxy requires authentication' option. You must add those credentials in the right format or your requests will fail.
There are two common ways to handle authentication:
Make sure there are no extra spaces before or after the username or password. Double-check your authentication details to avoid errors. Also avoid special characters that may need URL encoding unless your provider documentation confirms the exact format.
Postman has a built in proxy that can capture HTTP and HTTPS traffic from your browser, device, or another app. This is useful when you want to turn real traffic into reusable Postman requests.
To use the capture proxy:
You can capture any request in Postman and send HTTP traffic through the built-in proxy for analysis.
You can then save these captured requests to a collection, add tests, and replay them whenever you want.
Sometimes you want to route traffic from your phone or another application through the same proxy you use in Postman.
Here is a simple pattern:
This setup allows you to connect to any online service through the proxy, ensuring all requests from Postman and your other devices are routed consistently.
This way, every tool shares the same IP and network path. If you are not sure how to do this on Android, you can follow an Android proxy settings guide to point your phone at the correct proxy server.
If you want to capture and convert mobile traffic into Postman requests, run the Postman capture proxy on your desktop, point your phone at it, and then replay the captured calls inside Postman.
When you use HTTPS, traffic between Postman and the proxy and between the proxy and the target server may be encrypted.
You should look at two separate connections:
Key points:
In Postman, make sure:
If requests fail only when you use the proxy, but work without it, collect the exact error messages. They often explain whether the problem is with SSL, DNS, or authentication. If you encounter SSL or certificate errors, review your proxy configuration settings in Postman to ensure everything is set up correctly.
It is common to debug stubborn API problems by comparing results across tools. For example, you might:
Comparing API requests sent through different tools can help identify proxy-related issues, as it allows you to see how each tool routes API requests through the configured proxy settings.
For terminal testing, you can follow a curl POST example to mirror the same request structure that you use in Postman collections.
If you want both tools to use the same network path, add the same proxy details to curl too. The article on using curl with a proxy shows how to pass proxy options on the command line so you can match what you configured in Postman.
When both Postman and curl produce the same error, you know the problem sits at the proxy or the remote API, not in your Postman collection.
Some APIs are more sensitive than others. Email services, payment gateways, and identity providers often have stricter security checks.
If you work with Gmail related APIs and need to use a proxy, you must take care with authentication scopes, consent, and IP reputation. A Gmail proxy tutorial can help you understand how to keep sessions stable while requests go through a proxy server.
When you pair a robust proxy with a clean Postman collection, you reduce the chance of random failures due to IP-level rate limiting, suspicious logins, or sudden location changes.
A good proxy provider gives you:
A provider like Proxy-Cheap lets you switch between different IP types while keeping configuration simple. You copy the host, port, username, and password from your account panel and paste them into the global proxy configuration in Postman.
From your proxy dashboard you can rotate IPs, manage ports, and create new endpoints for Postman without changing your collections.
Using a reliable proxy provider can significantly enhance the overall Postman experience by improving performance, reliability, and seamless integration for API testing.
When working with multiple APIs or services, there are times when you don’t want every request to go through your configured proxy server. Some endpoints may require direct access for security, performance, or compliance reasons. That's where Postman's proxy exceptions feature comes in.
Proxy exceptions in Postman let you specify a list of domains or URLs that should be excluded from your proxy configuration. Any requests sent to these destinations will connect directly, without being routed through the proxy. This is especially useful if you're testing internal APIs, accessing local servers, or working with third-party services that reject proxy traffic.
To configure proxy exceptions in Postman:
For example, if you want to prevent Postman from sending requests to ``` localhost
or your company's internal API server through the proxy, simply add those addresses to the proxy exceptions list. Postman will then send requests to those destinations directly, while all other traffic continues to use your proxy server as configured. Using proxy exceptions ensures you have fine-grained control over your network traffic, allowing you to optimize performance, maintain security, and avoid unnecessary routing for trusted or sensitive endpoints. This feature is a key part of advanced proxy configuration in Postman, helping you tailor your setup to fit complex API development and testing workflows.
If Postman returns errors when you use a proxy, follow this checklist.
In this case, the proxy is likely the cause.
Check:
Also test the same proxy with a simple curl command to see if it behaves the same. This helps isolate whether the issue sits in Postman or in the proxy itself.
Try these steps:
If you see repeated 407 Proxy Authentication Required responses, your credentials are wrong or missing.
Double check:
If your provider offers both user based auth and IP allowlisting, make sure you are using the correct method in your account.
If HTTPS requests fail only when the proxy is on, look at:
Talk to your network admin if this is a company proxy, as they should supply you with the required certificates and instructions.
In some setups, you first configure a proxy at the OS level and then let Postman inherit it. You can perform a manual proxy setup in your operating system by entering the proxy address and port in the system network settings before enabling the system proxy in Postman.
On Windows, for example, you might set a proxy in the system network settings, then enable “Use system proxy” in Postman so every request follows the same route.
If your whole Windows machine must use the proxy for browsers, CLI tools, and Postman, it is best to configure the OS first, then only use the system proxy option inside Postman. This keeps all tools consistent, including any scripts that rely on system wide settings.
Many teams run Postman collections in automated workflows such as CI pipelines. In these setups, you can send API requests through proxies by configuring Postman or related tools to use system or custom proxy settings, ensuring secure and controlled API communication.
In these setups, you often:
When you move from local Postman testing to automated runs, keep the following consistent:
This avoids surprises where tests pass locally but fail in CI due to different network paths.
Postman is only one part of your stack. You may also use proxies in:
To keep things simple, try to standardize on a small number of proxy endpoints. Use the same endpoints in Postman, curl, and scripts whenever possible.
If you test from different locations or IP types, give each environment its own endpoint and document which collections use which proxies.
You now know how to:
While Postman typically uses a global proxy, you can also configure a proxy for a single request by leveraging environment variables or command line tools, giving you flexibility for individual or limited usage scenarios.
The next step is simple. Pick a reliable proxy endpoint, plug its host, port, and credentials into Postman, send a test request, and confirm your IP and location match what you expect.
Once that works, you can build collections, automate tests, and run complex API flows with full control over how every request leaves your machine.