Logo
Proxy 101
May 21, 2026
5 min

Mac Proxy Settings: How to Change Proxy on macOS

Alex Sadovskij
Alex Sadovskij
CEO Proxy-Cheap
Mac Proxy Settings: How to Change Proxy on macOS
Summary
Learn how to change proxy settings on Mac, configure HTTP, HTTPS, SOCKS, and PAC proxies, test your setup, and fix common macOS proxy errors.

You can change proxy settings on a Mac by going to System Settings (or System Preferences), opening your active network, clicking the Proxies tab, and then entering the server address, port, and login details given by your proxy provider. This process involves configuring your mac proxy server and adjusting the proxy server settings to control how your Mac connects to the internet, which can help improve privacy, security, and access to restricted content. Once you apply the changes, all apps that use system network settings will send traffic through the proxy until you turn it off.

Below you will see a step by step guide on how to do this for different macOS versions, how to test if the proxy works, and how to fix common errors.

What are proxy settings on a Mac

Proxy settings on a Mac control how your device connects to the internet. Instead of connecting directly, your Mac can send traffic through another server called a proxy, which acts as an intermediary server between your device and the internet.

These settings live inside your network configuration. When you switch them on, macOS routes web requests through the proxy type and protocol you choose, such as HTTP, HTTPS, or SOCKS.

If you are new to proxies in general, it is helpful to first read a simple explanation. You can start with this clear introduction to what proxies are and how they work.

In daily use, Mac proxy settings let you:

  • Change your apparent IP address
  • Separate traffic for work, school, or automation tools
  • Add an extra privacy or control layer
  • Meet network rules in companies or schools

You decide when these settings are active and which apps use them.

When you should change proxy settings on Mac

You do not always need a proxy. But in some cases, changing Mac proxy settings is the best way to reach a goal.

Common reasons include:

  • You use a proxy for work and must set it manually
  • You want a different IP address for research, marketing, or testing
  • You manage several accounts and need separate network routes
  • Your employer or school gave you a PAC (proxy auto-config) file or URL
  • You want to limit apps from revealing your real IP address
  • You are running tools that need HTTP or SOCKS5 proxies
  • You want to change your location or access geo restricted content online

If one of these fits your situation, it makes sense to learn how to adjust your settings safely.

How Mac proxy settings work inside macOS

On a Mac, proxy settings sit under each network service. For example, Wi-Fi and Ethernet can each have different proxy rules.

Inside each service you can:

  • Enable or disable specific proxy types
  • Choose automatic configuration with a PAC file
  • Add manual settings for HTTP, HTTPS, and SOCKS proxies
  • Set exceptions for websites that should bypass the proxy. Addresses in the '*.local' domain or the '169.254/16' IP range are typically used for the local network and are often set to bypass the proxy.

Most apps on macOS use the system network settings by default. This means that when you turn a proxy on at the system level, browsers like Safari and Chrome and many other apps will follow those rules.

Some tools and browsers allow separate proxy settings inside the app. For those, you can either:

  • Use system proxy settings, or
  • Set a custom proxy only for that app

Understanding this helps you avoid surprises, such as one browser using the proxy while another does not.

How to change proxy settings on macOS Ventura, Sonoma, and newer

On newer macOS versions, you use the System Settings app.

Follow these steps:

  1. Click the Apple icon in the top left corner.
  2. Select “System Settings”.
    You can also open system preferences from the Apple menu.
  3. In the left sidebar, look for the network panel icon and click Network to access network options. Click “Wi-Fi” if you are on wireless or “Network” then choose your wired connection.
  4. Next to your active network, click “Details”.
  5. In the window that opens, click the Proxies button or click Proxies to access proxy settings.

You now see all proxy options for this network service. To activate your proxy settings, click Apply or Done.

Configure automatic proxy (PAC file or URL)

If your company or proxy provider gave you a PAC file URL, use these steps:

  1. In the Proxies tab, turn on “Automatic Proxy Configuration”.
  2. Paste the PAC file URL into the URL field.
  3. Click “OK” or “Done”.
  4. Click “Apply” to save your network changes.

Your Mac will now fetch rules from that file and decide which traffic goes through which proxy.

Alternatively, you can enable 'auto proxy discovery' in the same Proxies tab to let your Mac automatically detect proxy settings on the network.

Configure manual HTTP or HTTPS proxy on macOS

If you have a single proxy server with host, port, and login details, set it manually.

  1. In the Proxies tab, check “Web Proxy (HTTP)” to enable an http proxy.
  2. Enter the proxy ip address provided by your service into the “Web Proxy Server” field. You may also need to enter the proxy name if your provider gives you one.
  3. Enter the port number given by your provider.
  4. If your proxy uses a username and password, check “Proxy server requires password”.
  5. Enter your username and password.
  6. If you also have an HTTPS proxy, check “Secure Web Proxy (HTTPS)” and repeat the same steps.
  7. Optional: Add hosts that should not use the proxy into the “Bypass proxy settings for these Hosts & Domains” field.
  8. Click “OK” or “Done”.
  9. Click “Apply” in the main network window.

From now on, web traffic that respects system settings will go through this HTTP or HTTPS proxy.

Configure a SOCKS proxy on macOS

SOCKS proxies route traffic on a lower level and work well with various apps and tools.

To set one up:

  1. In the Proxies tab, check “SOCKS Proxy”.
  2. Type the proxy hostname or IP.
  3. Enter the port. Many SOCKS proxies use ports like 1080, but always follow the value given by your provider.
  4. If needed, enable authentication and enter your user name and password.
  5. Click “OK” or “Done”.
  6. Click “Apply”.

Applications that honor system proxy settings and support SOCKS will now route their traffic through this server.

Turn Mac proxy settings off on newer macOS

If you want to disable proxy on your Mac, follow these steps:

  1. Open “System Settings”.
  2. Go to “Wi-Fi” or your network service and click “Details”.
  3. Open the “Proxies” tab.
  4. Uncheck all enabled proxy types to disable proxy settings.
  5. Click “OK” or “Done”.
  6. Click “Apply”.

Your Mac will now connect directly without a proxy.

How to change proxy settings on older macOS versions

On older macOS releases that still use System Preferences instead of System Settings, the layout is slightly different but the logic is the same.

  1. Click the Apple menu.
  2. Select “System Preferences”.
  3. Click on “Network”.
  4. Choose your active network service, such as Wi-Fi.
  5. Click the “Advanced” button.
  6. Select the “Proxies” tab.

In this tab you can configure automatic and manual proxies just like on newer macOS versions.

The options include:

  • Automatic Proxy Configuration
  • Web Proxy (HTTP)
  • Secure Web Proxy (HTTPS)
  • SOCKS Proxy
  • FTP and other legacy types

To turn on proxy server for your chosen proxy type, check the relevant box next to the proxy option you want to enable. Then, fill in the server details, click “OK” and “Apply”.

How to change proxy settings for Safari on Mac

Safari usually follows your system proxy settings, so often you do not need to do anything special inside the browser.

However, it is useful to know where these options live:

  • Open Safari.
  • Click "Safari" in the top menu bar.
  • Choose "Settings" (or "Preferences" on older versions).
  • Open the "Advanced" tab.
  • Click the "Change Settings" button next to "Proxies".

This button takes you directly to the same macOS Proxies tab you saw earlier. For more browser specific tips, you can follow this detailed Safari proxy settings guide.

Once the system proxy is set up, Safari will use it for web traffic unless a site is in your bypass list.

How to use a proxy in Google Chrome on Mac

Google Chrome on macOS also relies on system network settings by default. There is no separate full proxy panel inside Chrome like on some other platforms.

To adjust the proxy Chrome uses:

  1. Open Chrome.
  2. Click the three dot menu in the top right corner.
  3. Choose "Settings".
  4. Scroll down to "System".
  5. Click "Open your computer's proxy settings".

This opens the same Proxies tab in your Mac network settings.

If you want browser specific advice for Chrome and other desktop systems, you can check the Google Chrome proxy settings guide.

How to find your proxy server address before changing settings

Before you can change proxy settings on your Mac, you need the correct server information. In many cases your proxy provider gives you:

  • Hostname or IP
  • Port number
  • Username and password, or an IP whitelist

If you already use a proxy on another device or inside a browser, you might want to copy those settings to your Mac. You can learn several ways to do that in this practical guide on how to find your proxy server address.

Using the right address and port is critical. One wrong digit will break the connection and cause errors.

How to test if your Mac proxy settings work

After you change settings, always test.

Here is a simple process:

  1. Open a browser.
  2. Visit a website that shows your IP address.
  3. Write down or remember the result.
  4. Turn the proxy on in your Mac network settings.
  5. Refresh the page.

If the IP address changes to the one provided by your proxy, the connection works.

Also test a few websites and actions you use often, such as email or project tools. Confirm that they load as expected and that performance is stable.

If tools or web pages fail to load, use the troubleshooting steps later in this guide.

Mac proxy settings and other devices in your setup

Many users connect multiple devices to the same proxy provider for a full workflow. Knowing how proxies work on other systems helps you keep a consistent setup.

When you align settings across devices, it is easier to manage accounts, automation tools, and workspaces in a predictable way.

Why the quality of your proxy provider matters

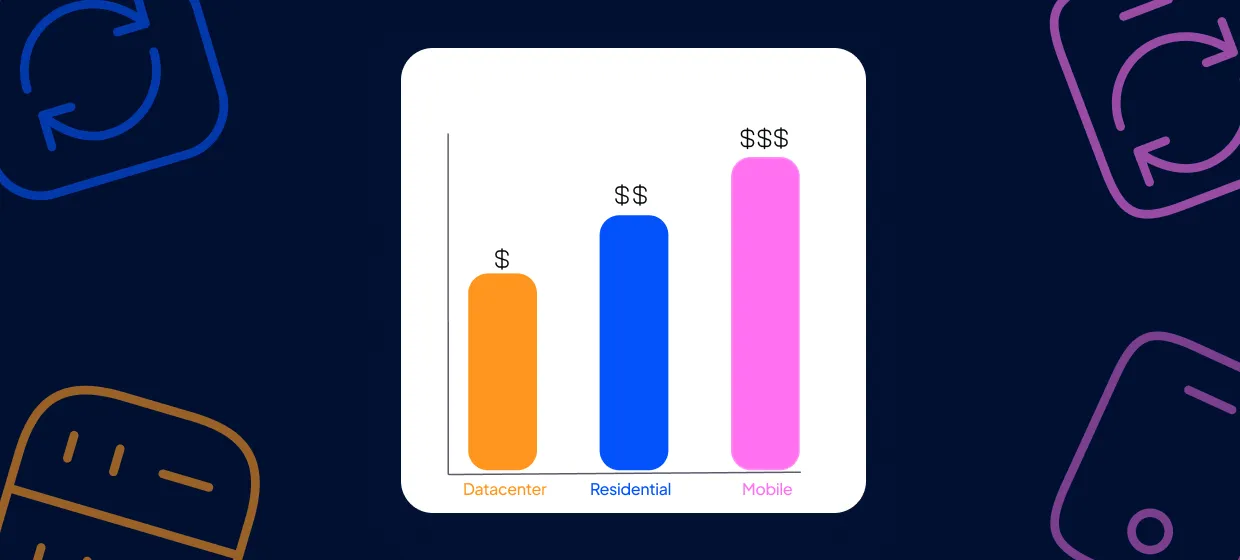
The Mac interface only controls how you connect. The real performance and reliability come from the proxy servers you use.

A strong provider gives you:

  • Stable and fast connections
  • Clear documentation and dashboards
  • IP types that match your use case, such as residential, datacenter, or mobile
  • Fine control over locations and sessions

A reliable proxy provider such as Proxy-Cheap offers diverse proxy types and clear guidance, so you can focus on your workflows instead of fighting network problems.

Common Mac proxy errors and how to fix them

Even with correct settings, you can run into problems. Here are frequent issues and tested fixes.

Error: Websites do not load or are very slow

Possible causes:

  • Wrong server hostname or port
  • Proxy server under heavy load
  • Network interruption between you and the proxy

Fix steps:

  1. Double check the hostname and port you typed.
  2. Confirm that your proxy subscription or access is still active.
  3. Test another proxy endpoint from your provider if possible.
  4. Try switching from HTTP to SOCKS (or the other way) if your provider allows it.
  5. Temporarily disable the proxy to confirm that your base internet connection is fine.

Error: Authentication pop up keeps appearing

Possible causes:

Wrong username or password

The proxy expects authentication but you left the fields blank

Your account uses IP whitelisting instead of user login

Fix steps:

Check your login credentials inside your proxy dashboard.

Re enter the username and password in your Mac proxy settings.

If your provider uses IP whitelisting, remove the username and password and make sure your current IP is whitelisted.

Error: Some apps use the proxy, others do not

Possible causes:

  • The app ignores system proxy settings
  • The app has its own proxy configuration panel

Fix steps:

  1. Check the app settings for a network or proxy section.
  2. Decide if you want the app to use system settings or a custom proxy.
  3. If the app cannot use system settings, set the same proxy details directly inside the app.

Error: "Could not connect to the proxy server"

Possible causes:

  • The proxy server is down
  • Your firewall or antivirus is blocking the connection
  • The port is wrong or blocked by your network

Fix steps:

  1. Try a different proxy server or port from your provider.
  2. Temporarily disable firewall or security tools and test again.
  3. If you are on a shared or office network, ask the network admin if outbound connections on that port are allowed.

Security and privacy tips for Mac proxy settings

Proxies interact directly with your traffic, so treat them as a sensitive part of your setup.

Here are safe practices:

  • Use proxies from providers that you trust
  • Avoid entering login details for proxies from unknown sources
  • Combine proxies with HTTPS websites for encrypted content
  • Log out of proxies when you no longer need them
  • Avoid passing sensitive data through free or public proxies

Remember that proxies are not the same as virtual private networks. Each tool solves different problems. You can use them together, but always test carefully so that your traffic goes where you expect.

How proxies fit into a wider network strategy

If you work in marketing, data collection, or account management, proxies are only one piece of your stack. You may also use:

  • Different browsers and profiles
  • Automation tools
  • CAPTCHAs and anti bot solutions
  • Scripts or bots that send frequent requests

Proxies help distribute this traffic and lower the risk of blocks. For more technical background, including SOCKS, HTTP, and other types, the earlier introduction to what proxies are and how they work is a helpful reference.

When you add or change proxies in this stack, do it methodically. Change one setting at a time and test. Keep notes of which IPs and ports work best for each project.

Set up your Mac proxy settings and stay in control

You now know how to:

  • Open Mac network settings and find the Proxies tab
  • Configure automatic and manual HTTP, HTTPS, and SOCKS proxies
  • Turn proxies on and off safely
  • Test that the new settings work
  • Fix common errors when they do not

With this knowledge, you can adjust your Mac proxy settings whenever your workflow changes. Whether you manage accounts, run research, or simply want more control over how your traffic moves, the steps in this guide are enough to get you going.

Choose a trusted proxy provider, collect your server details, and apply the settings on your Mac today so you always stay in charge of your connection.

Frequently Asked Questions

On recent macOS versions, click the Apple menu, then "System Settings", then open "Wi-Fi" or your active network, click "Details", and go to the "Proxies" tab. On older versions, use "System Preferences" then "Network" then "Advanced" then "Proxies".

Most home users do not need a proxy by default. You usually only set one if you have a clear reason, such as work rules, privacy needs, or account and automation tasks that require a specific IP. If you are not sure, keep proxy settings off until you have a defined goal and a reliable provider.

Yes, it is safe as long as you use correct details from a trusted provider. Your Mac only sends traffic to the proxy servers you configure. Problems occur when people use unknown or untrusted proxies and send sensitive data through them. Treat proxy details like any other security credential.

Common reasons include a wrong server address or port, expired proxy access, incorrect username or password, or local firewall blocks. Go back to your network settings, confirm all details, test your base internet without the proxy, and then test again with updated values. If issues remain, contact your proxy provider support with screenshots of your settings.