To use a proxy in Puppeteer, you start Chrome with the –proxy-server flag and, if needed, log in to the proxy inside a new page. Proxies route your requests through a different IP address, helping protect your privacy and access publicly available content from multiple regions. You can pass one proxy to the whole browser or use a different proxy per context. With a proxy pool, you can rotate IPs between requests so your automation looks like many real users instead of one. Proxy rotation and IP rotation are essential for web automation tasks and web scraping, as they help maintain stable, reliable sessions, reduce IP-level rate limiting, and ensure efficient large-scale data extraction.

A Puppeteer proxy is a proxy server that sits between your Puppeteer script and the target site. The proxy acts as an intermediary server, routing your browser automation traffic and replacing your visible IP address to enhance privacy. Every request goes through the proxy before it reaches the site. The site sees the proxy server's IP address, not your actual IP address.
You can use HTTP, HTTPS, or SOCKS proxies with Puppeteer. The most common format is http://user:password@host:port. The same ideas work for both scraping and general browser automation.
When you send many requests from one IP, sites may slow you down or apply IP-level rate limiting. With proxies, you can spread requests across many IPs. This helps you run larger projects with more reliable connectivity and less manual work. For more complex use cases, you can use a proxy chain or advanced proxy configuration to further enhance privacy and control.
Proxies help you reduce rate limits and maintain reliable connectivity when you scrape or test at scale. They let you spread your traffic across many IPs and locations. This makes your tools look more like real users.
You can also keep your real IP private. A proxy hides your device and network. This is useful for competitive research, price monitoring, and QA testing against your own site. Proxies are essential for maintaining reliable connectivity through IP-level rate limiting, allowing you to keep uninterrupted access to target websites.
Proxies also help you match local user behavior. You can test localized sites and content by sending traffic through IPs in specific countries or cities. Rotating IP addresses and using multiple proxy servers can help you maintain stable, reliable sessions, reduce IP-level rate limiting, and keep access during large-scale automation tasks.
If you plan to use Puppeteer for automation, it also helps to understand general proxies for bots. The same rules about IP quality, rotation, and warm up apply here too. Always choose a reliable proxy provider and manage your authentication credentials securely to ensure smooth and secure proxy usage.
This section shows the minimum code you need. You will launch a browser, pass a proxy, and load a page.
To use proxies with Puppeteer, you need to configure Puppeteer with the correct proxy configuration and specify the proxy address. This ensures your proxy connection is properly established for web scraping or automation tasks.
In the code example below, you specify the proxy server's IP address and port in the launch arguments:
const puppeteer = require('puppeteer'); (async () => { const browser = await puppeteer.launch({ args: ['--proxy-server=PROXY_IP_ADDRESS:PORT'] }); const page = await browser.newPage(); await page.goto('https://example.com'); await browser.close(); })();
Make sure to install Puppeteer by running npm install puppeteer before using these examples.
Here is a simple setup in Node.js with Puppeteer:
import puppeteer from "puppeteer"; const PROXY_HOST = "proxy.example.com"; const PROXY_PORT = 8000; // change to your port async function main() { const browser = await puppeteer.launch({ headless: "new", // or true args: [ `--proxy-server=http://${PROXY_HOST}:${PROXY_PORT}`, ], }); const page = await browser.newPage(); await page.goto("https://httpbin.org/ip", { waitUntil: "networkidle2" }); const content = await page.content(); console.log(content); await browser.close(); } main().catch(console.error);
This example uses a single HTTP proxy for all browser traffic. All HTTP requests and network requests, including navigation and API calls, are routed through the proxy connection. Every tab uses the same proxy IP. You can use a local proxy server for testing purposes or to set up proxy chaining for more advanced scenarios. To debug proxy-related issues, you can inspect the proxy response to verify the data received from the proxy server. This setup is enough for testing and small projects.
Most paid proxies are authenticated proxies that require authentication credentials, such as a username and password, to access the service. You can send the username and password inside the proxy URL or log in using Puppeteer's authenticate() method.
Here is the version that uses page.authenticate:
import puppeteer from "puppeteer"; const PROXY_HOST = "proxy.example.com"; const PROXY_PORT = 8000; const PROXY_USER = "username"; const PROXY_PASS = "password"; async function main() { const browser = await puppeteer.launch({ headless: "new", args: [ `--proxy-server=http://${PROXY_HOST}:${PROXY_PORT}`, ], }); const page = await browser.newPage(); await page.authenticate({ username: PROXY_USER, password: PROXY_PASS, }); await page.goto("https://httpbin.org/ip", { waitUntil: "networkidle2" }); const content = await page.content(); console.log(content); await browser.close(); } main().catch(console.error);
In this setup, Puppeteer uses basic HTTP authentication to provide the required authentication credentials to the authenticated proxy every time the page requests them. This works well with most HTTP and HTTPS proxies.
Sometimes you want each account or task to have its own IP. For this, you can use separate browser instances or puppeteer instances, each configured with a different proxy. This ensures that each browser instance uses a different IP address, which is essential for managing multiple proxies and maintaining privacy.
You still pass one proxy to the whole browser, but you can launch more than one browser. Each browser can use a different proxy. Inside each browser, you then create multiple contexts and pages for that IP.
async function launchWithProxy(proxyUrl) { return puppeteer.launch({ headless: "new", args: [`--proxy-server=${proxyUrl}`], }); } async function main() { const browser1 = await launchWithProxy("http://user1:pass1@host1:8000"); const browser2 = await launchWithProxy("http://user2:pass2@host2:8000"); const context1 = await browser1.createIncognitoBrowserContext(); const context2 = await browser2.createIncognitoBrowserContext(); const page1 = await context1.newPage(); const page2 = await context2.newPage(); await page1.goto("https://httpbin.org/ip"); await page2.goto("https://httpbin.org/ip"); await browser1.close(); await browser2.close(); } main().catch(console.error);
This approach allows you to manage multiple proxies by launching separate puppeteer instances or browser instances, each with its own proxy configuration and different IP addresses. This pattern is useful when you manage many profiles. Each browser process maps to one proxy and one group of accounts.

Not all proxies behave the same. The type you choose, along with your chosen proxy provider, can significantly impact the speed, success rate, and cost of your web data collection.
With shared proxies, many users share the same IPs. This keeps the price low, but risk is higher. If one user abuses an IP, other users may see more rate limiting.
Dedicated or private proxies map IPs only to you. They usually cost more, but you have full control over how each IP is used. In Puppeteer, you can specify your chosen proxy server directly in your proxy settings, giving you more control over browser traffic and making it easier to manage login flows, payments, and long lived sessions.
You may also rent access to a large pool. In that case, you use a single endpoint, and the provider gives you a different IP for each request or session.
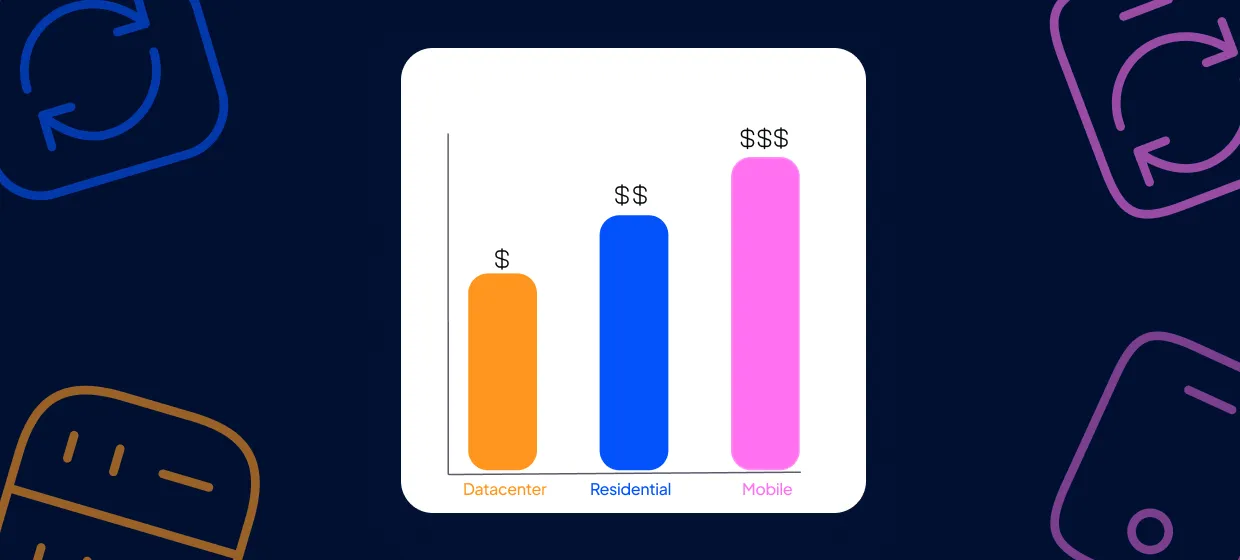
Datacenter proxies come from cloud providers. They are fast and cheap. Many websites can still detect them, since they look like data centers.
Residential proxies come from real user devices. These IPs look like home or mobile connections. They often work better on strict sites that care about IP reputation.
If you need real user IPs in many regions, consider a pool of high quality residential proxies. They cost more than simple datacenter IPs but give stronger success rates on sensitive targets.
Static proxies give you the same IP every time you connect. They are useful for accounts, dashboards, and repeat logins.
Rotating proxies change your IP over time, providing a new IP address with each rotation. The rotation can happen on every request, every session, or on a fixed timer. You can implement proxy rotation in your Puppeteer setup by automating the process of switching IP addresses using a list of proxies. This helps you spread traffic across many IPs and avoid bans.
If you are not sure which style you need, read about static vs rotating proxies. You will see common use cases and how each option behaves in production.
Some providers offer a backconnect gateway. You connect to one host and port, and the provider routes each request through a different IP.
Backconnect gateways handle rotation on the server side. You do not have to manage a raw list of IPs yourself.
To learn how these gateways work under the hood, check this guide on backconnect proxies. The same pattern fits very well with Puppeteer, since you can keep your code simple and let the gateway rotate for you.
Rotating IPs is key for serious scraping and automation. In Puppeteer, implementing puppeteer IP rotation and proxy rotation is essential for maintaining stable, reliable sessions and reducing IP-level rate limiting. You can rotate at the browser level or at the proxy level.
The most direct method is to launch a new browser for each proxy. You can select a random proxy or a different proxy server from your list for each browser launch. This helps rotate IP addresses and maintain stable, reliable sessions during web scraping.
const proxies = [ "http://user1:pass1@host1:8000", "http://user2:pass2@host2:8000", "http://user3:pass3@host3:8000", ]; function getRandomProxy(proxies) { return proxies[Math.floor(Math.random() * proxies.length)]; } async function scrapeWithProxy(proxyUrl) { const browser = await puppeteer.launch({ headless: "new", args: [`--proxy-server=${proxyUrl}`], }); const page = await browser.newPage(); await page.goto("https://example.com", { waitUntil: "networkidle2" }); // run your scraping logic here await browser.close(); } async function main() { for (let i = 0; i < proxies.length; i++) { const proxy = getRandomProxy(proxies); // select a random proxy try { await scrapeWithProxy(proxy); } catch (err) { console.error("Error with proxy", proxy, err.message); } } } main().catch(console.error);
Some providers also offer API calls that automate proxy selection, proxy rotation, and request management, so you don't have to manually handle random proxy or different proxy server selection in your code.
This is fine for small jobs. For big jobs, you may want workers or a queue so you can run many browsers in parallel.
If your provider gives you a rotating or backconnect endpoint, your code stays almost the same. You connect to one proxy URL, but the IP behind it changes.
const ROTATING_PROXY = "http://user:[email protected]:8000"; async function main() { const browser = await puppeteer.launch({ headless: "new", args: [`--proxy-server=${ROTATING_PROXY}`], }); const page = await browser.newPage(); for (let i = 0; i < 5; i++) { await page.goto("https://httpbin.org/ip", { waitUntil: "networkidle2" }); const body = await page.evaluate(() => document.body.innerText); console.log("Response", i + 1, body); } await browser.close(); } main().catch(console.error);
Each request or session may come from a different IP, even though your code uses a single endpoint. This is efficient and easy to scale.
For more advanced setups, you can use a proxy chain, which layers multiple proxies together to further enhance privacy or route traffic through complex networks. The proxy-chain library can be used with Puppeteer to implement this technique.
In all these cases, the proxy acts as an intermediary between your Puppeteer scraper and the target website. It routes your requests, replaces your visible IP address, helps maintain reliable connectivity, and can improve scraping efficiency by rotating or chaining proxies as needed.
Many sites use strict bot filters. They track IP, browser fingerprint, cookies, and behavior.
A good proxy setup is only one part of a full strategy. You also need human like timing, realistic headers, and correct browser settings.
You may need special IPs that have strong trust. For this, some providers offer CAPTCHA proxies. These IPs are tuned for high success on sites with heavy challenges.
If you automate login or checkout flows, test your flows in small batches first. Track where CAPTCHAs appear. You can then assign stronger IPs or slower timing to those paths.
Also, read about general bot behavior in material on proxies and automation. This helps you avoid patterns that look too perfect or too fast.
When you mix proxies with Puppeteer, you may see errors that look random at first. In most cases, the cause falls into one of a few groups, often related to issues with the proxy connection or the proxy response.
If pages load very slowly or fail to load, look at timeouts first. Proxies add latency. Cheap or overloaded proxies may delay every request.
Increase timeout and use waitUntil: "networkidle2" for better results. You can also set page.setDefaultNavigationTimeout to give each page more time.
If only some sites fail, the site may apply rate limiting to your IP range. Switch to another region or proxy pool. Check if the same URL loads in a clean browser with the proxy off.
If you see many 403, 429, or 503 responses, the target site is unhappy with your traffic.
Slow down your request rate. Spread traffic across more IPs. Use better quality IPs for sensitive areas.
You can log response status codes with Puppeteer to see patterns. For example:
page.on("response", res => { console.log(res.status(), res.url()); });
Use this to detect when one proxy starts to fail. You can then drop it from the pool.
If the browser keeps asking for proxy credentials, your details may be wrong.
Check the username and password. Make sure page.authenticate runs before page.goto. Also confirm that your account has access to the IPs and ports you use.
Some proxies break HTTPS if they are misconfigured. If you see certificate errors, test with a simple tool like curl through the same proxy.
If curl fails, the issue is not in Puppeteer. Fix the proxy or contact support.
If curl works, Puppeteer may need flags such as --ignore-certificate-errors, but use them with care. Only do this when you fully trust the proxy and target.
The right habits make your setup stable and easier to debug.
These steps help you scale from a demo script to a long running service.

Your proxy provider affects success rate more than your code in many cases. Selecting a chosen proxy provider and, more importantly, a reliable proxy provider is crucial for successful Puppeteer projects. Look at quality and support first, not only price.
Check how many networks and regions they cover. Ask how they manage abuse and rate-limited IPs. Make sure they can handle your traffic volume.
You also want clear dashboards, usage stats, and an API. This makes it easier to track usage and rotate IPs.
A provider like Proxy-Cheap focuses on automation use cases, so you can get pools that work well with scraping, bots, and browser tools. Look for transparent pricing, support that understands Puppeteer, and clear guides for quick setup.
If you want to learn more about proxy models and access types, read this article on what are shared proxies. It explains how access levels change both price and reliability.
You now know how to add a proxy to Puppeteer, handle authentication, and rotate IPs at scale. You have seen which proxy types fit scraping, logins, and heavy automation.
Next, build a small test project. Start with one proxy, then add rotation. Track errors and success rates. Once the small test is stable, add more workers and pages.
When you are ready to run real workloads, pick a provider that supports puppeteer friendly pools, strong IP quality, and clear tools. To explore plans and get your first proxy endpoints, visit Proxy-Cheap and start your Puppeteer project today.