Key takeaways
MuLogin is a budget-friendly multi-account browser, and like every antidetect browser it only works as intended when each profile sits behind its own clean IP. This guide covers the whole path: what MuLogin does, how to install it, how to attach a proxy to a profile, how rotation works, and how to script it through the Local API. Every field name and endpoint here was checked against the live product.
What is MuLogin?
MuLogin is an antidetect browser built for running many accounts from one machine. It is a Chromium-based virtual browser: each profile gets its own fingerprint, cookies, local storage, and cache, all fully isolated from every other profile. Two profiles open side by side read as two separate devices to the sites they visit.
MuLogin is a Windows desktop application, including support for older Windows versions. Platform listings vary, so confirm the current options on the MuLogin download page before you install. The product leans into cross-border commerce and social media teams, and it pairs a low entry price with high profile counts on the upper tiers.
A proxy is the second half of that isolation. A distinct fingerprint on a shared IP still ties every profile back to one connection. Giving each profile its own IP is what completes the separation, which is why proxy settings live right inside each profile's configuration.
What is MuLogin used for?
MuLogin is used wherever one operator or team runs many accounts in parallel and needs each account to stay consistent with its market. The common applications:
The common thread is compliant multi-account work. Each profile behaves like a genuine local user because it carries a real, market-appropriate IP and its own fingerprint.
Key features of MuLogin
The features that matter once you run more than one account:
Is MuLogin free to use?
MuLogin offers a 3-day free trial rather than a permanent free tier. That window is enough to create a profile, attach a proxy, and confirm the workflow end to end before you pay.
Paid plans scale by profile count and sub-accounts:
| Plan | Price (monthly) | Profiles | Sub-accounts |
|---|---|---|---|
| Personal | $59 | 100 | 1 |
| Solo | $99 | 200 | 5 |
| Team | $209 | 500 | 10 |
| Scale | $499 | 3,000 | 20 |
| Custom | Contact sales | Unlimited | Custom |
Pricing tiles change, so confirm the current numbers on the MuLogin site before you buy. One point stays constant: MuLogin sells the browser, not the IPs. You bring your own proxies, which is where a pay-as-you-go provider keeps the running cost in check.
How to install MuLogin
Installation is quick on Windows.
With the client open on your account, you are ready to create your first profile.
Quickstart: create your first MuLogin profile
Before adding a proxy, confirm the basic profile workflow so you know what a clean profile looks like.
Visit an IP echo service such as httpbin.org/ip in that profile. It reports your real IP, because no proxy is attached yet. The next two sections close that gap.
Why you need a proxy with MuLogin
A unique fingerprint on a shared IP only does half the job. If ten profiles all exit through your home or office connection, the accounts inside them are easy to correlate at the network layer, no matter how different their fingerprints look. Routing each profile through its own IP on a residential proxy network is what makes the separation real. Three concrete reasons to put a proxy behind every serious profile:
The practical rule: match the IP type to the account. High-value social and marketplace accounts want residential or mobile IPs, while high-volume public data tasks run fine on datacenter.
How to set up a proxy in MuLogin
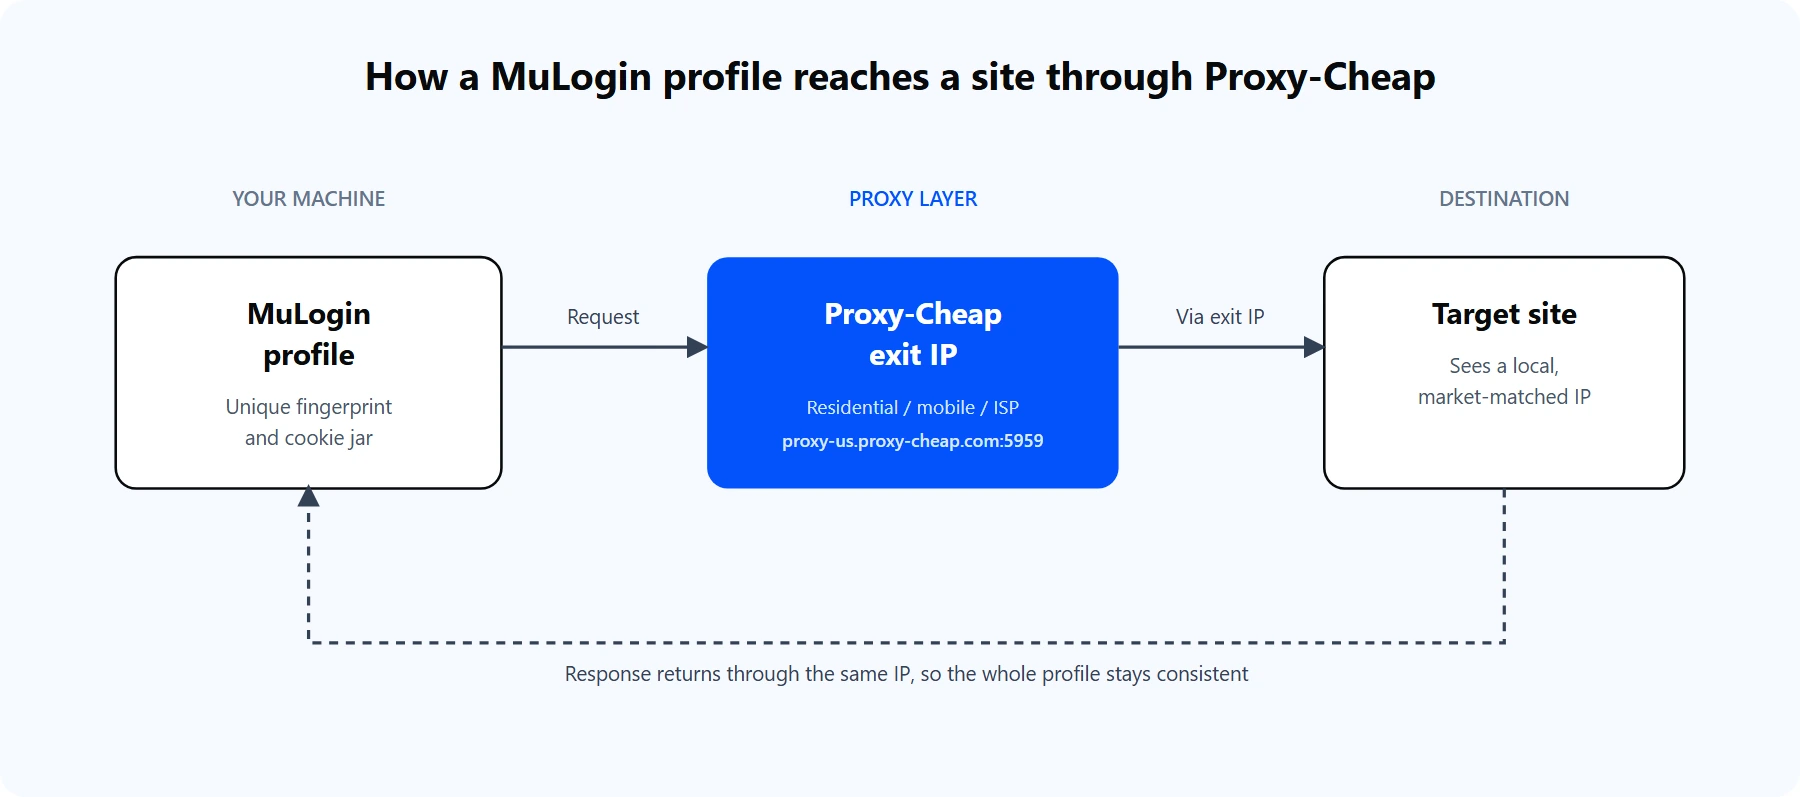
Each MuLogin profile carries its own fingerprint and exits through a Proxy-Cheap IP, so the target site sees a local user, not your real connection.
Proxy setup happens per profile, inside the Basic Configuration tab. Here is the full sequence.
For a Proxy-Cheap rotating residential proxy, the values map like this:
Proxy type: HTTP
IP address: thehub.proxy-cheap.com
Port: 8080
Login user: <your-proxycheap-username>
Login password: <your-proxycheap-password>
For static residential, ISP, or datacenter proxies, each IP has its own host and port. Copy the exact values from the dashboard's Setup Credentials panel; the Proxy-Cheap dashboard guide shows where to generate them. If your machine has a stable IP, you can whitelist it in the dashboard on static products and leave the login fields empty.
You can confirm the same credentials from a terminal before you paste them into MuLogin. The command below reaches the live US gateway:
# A 407 response with placeholder credentials confirms the gateway
# is reachable and expects your real username and password.
curl -x http://thehub.proxy-cheap.com:8080 \
-U '<your-proxycheap-username>:<your-proxycheap-password>' \
https://httpbin.org/ip
A real credential pair returns a JSON body with an exit IP from the pool. That IP is what every profile bound to this proxy will present.
Rotating proxies with MuLogin
There are two ways to rotate IPs, and the right one depends on the Proxy-Cheap product you buy.
For most multi-account work you actually want a steady IP on a given account, so its login history stays consistent. That is what static residential and ISP proxies deliver. Rotation is for tasks that touch many pages across many identities, such as research crawls and ad checks. The static vs rotating proxies guide covers where each one fits.
MuLogin also supports SOCKS4 and IPv6 in the type dropdown. With the Proxy-Cheap rotating gateway you do not need a special rotating type, because rotation is handled at the gateway and the standard HTTP or SOCKS5 option works cleanly.
Advanced: automate proxied profiles with the Local API
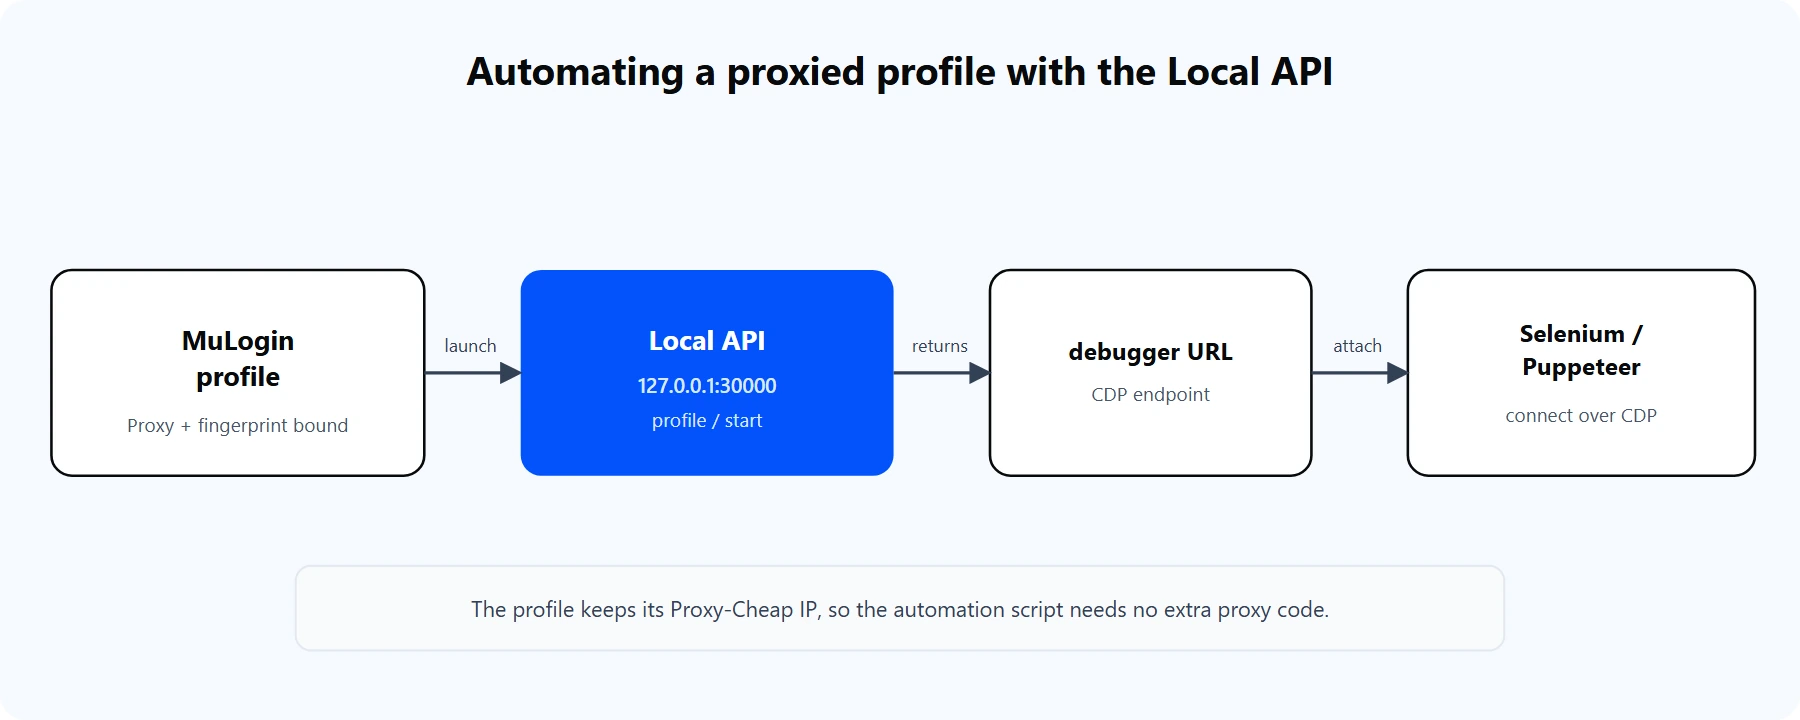
The Local API launches a proxied profile and returns a debugger URL. Selenium or Puppeteer attach to it over CDP.
MuLogin runs a local REST API you can drive from any HTTP client on the same machine. Find the port in MuLogin settings under the Local API section (30000 by default in many installs). When you call the launch endpoint, MuLogin starts the profile and returns a debugger connection URL, which is the Chrome DevTools Protocol endpoint your automation attaches to. Check MuLogin's Local API docs for the exact launch path.
# Launch a profile through the Local API (port shown in MuLogin settings).
# The response returns the debugger address that Selenium or Puppeteer uses.
# See MuLogin's Local API docs for the exact launch endpoint path.
curl "http://127.0.0.1:30000/<launch-endpoint>?profileId=<profile-id>"
Because the proxy is bound to the profile inside MuLogin, the automation inherits it with no extra proxy code. Selenium attaches to the returned debugger address:
from selenium import webdriver
from selenium.webdriver.chrome.options import Options
# debugger_address comes from the Local API launch response.
options = Options()
options.add_experimental_option("debuggerAddress", "127.0.0.1:<debug-port>")
driver = webdriver.Chrome(options=options)
driver.get("https://httpbin.org/ip") # already exits through the Proxy-Cheap IP
print(driver.page_source)
driver.quit()
Puppeteer uses the same idea through puppeteer-core: connect to the returned browserWSEndpoint instead of downloading a separate Chromium. In both cases MuLogin owns the proxy and the fingerprint, and your script only drives the page.
Common errors and how to fix them
Most proxy problems in MuLogin fall into a handful of buckets.
1. The network check fails. The most frequent cause is a proxy type mismatch. A SOCKS5 proxy set to HTTP, or the reverse, fails the check. Confirm the type with your provider, then run Check the network again.
2. `ERR_SOCKS_CONNECTION_FAILED`. The SOCKS5 proxy is offline or misconfigured, or SOCKS4 was selected for a SOCKS5 proxy. Select SOCKS5, and confirm the IP and port are current.
3. Wrong port or login. Copy the IP, port, login user, and password straight from the dashboard. A single trailing space breaks authentication. The terminal curl test above confirms a credential pair works before you paste it into MuLogin.
4. The proxy IP is expired or out of traffic. Many proxies are time-limited or metered. If a proxy that once worked now fails the check, confirm the IP is still active and the account has balance left.
5. Timezone or language does not match the IP. Align the profile's timezone, geolocation, and language with the proxy location. A US IP paired with a European clock is an obvious inconsistency.
6. The proxy works elsewhere but not in MuLogin. A local firewall may allow only ports 80 and 443, or your network cannot reach the proxy's region. Test the same credentials with the curl command to separate MuLogin from the network.
Is MuLogin good? Pros and cons
For budget-conscious multi-account work, MuLogin is a capable option. The profile isolation is solid, the proxy fields are simple, high profile counts are affordable, and the Local API makes automation straightforward. A few honest trade-offs are worth weighing.
Pros
Cons
The middle ground for most operators: start on the trial or the Personal plan, pair it with a pay-as-you-go proxy pool, and scale profiles and IPs together as the account count grows.
Choosing the right Proxy-Cheap proxy for MuLogin
The best proxy for a profile depends on the account it holds and the work it does. This matrix maps common MuLogin workloads to the Proxy-Cheap product that fits.
| Workload | Rotating Residential | Static Residential / ISP | Mobile | Datacenter |
|---|---|---|---|---|
| High-value social accounts | Workable | Best fit | Best fit | Not ideal |
| E-commerce and marketplace | Workable | Best fit | Workable | Not ideal |
| Advertising and ad verification | Best fit | Workable | Workable | Workable |
| Market research crawls | Best fit | Workable | Not needed | Best fit |
| High-volume public data tasks | Workable | Not needed | Not needed | Best fit |
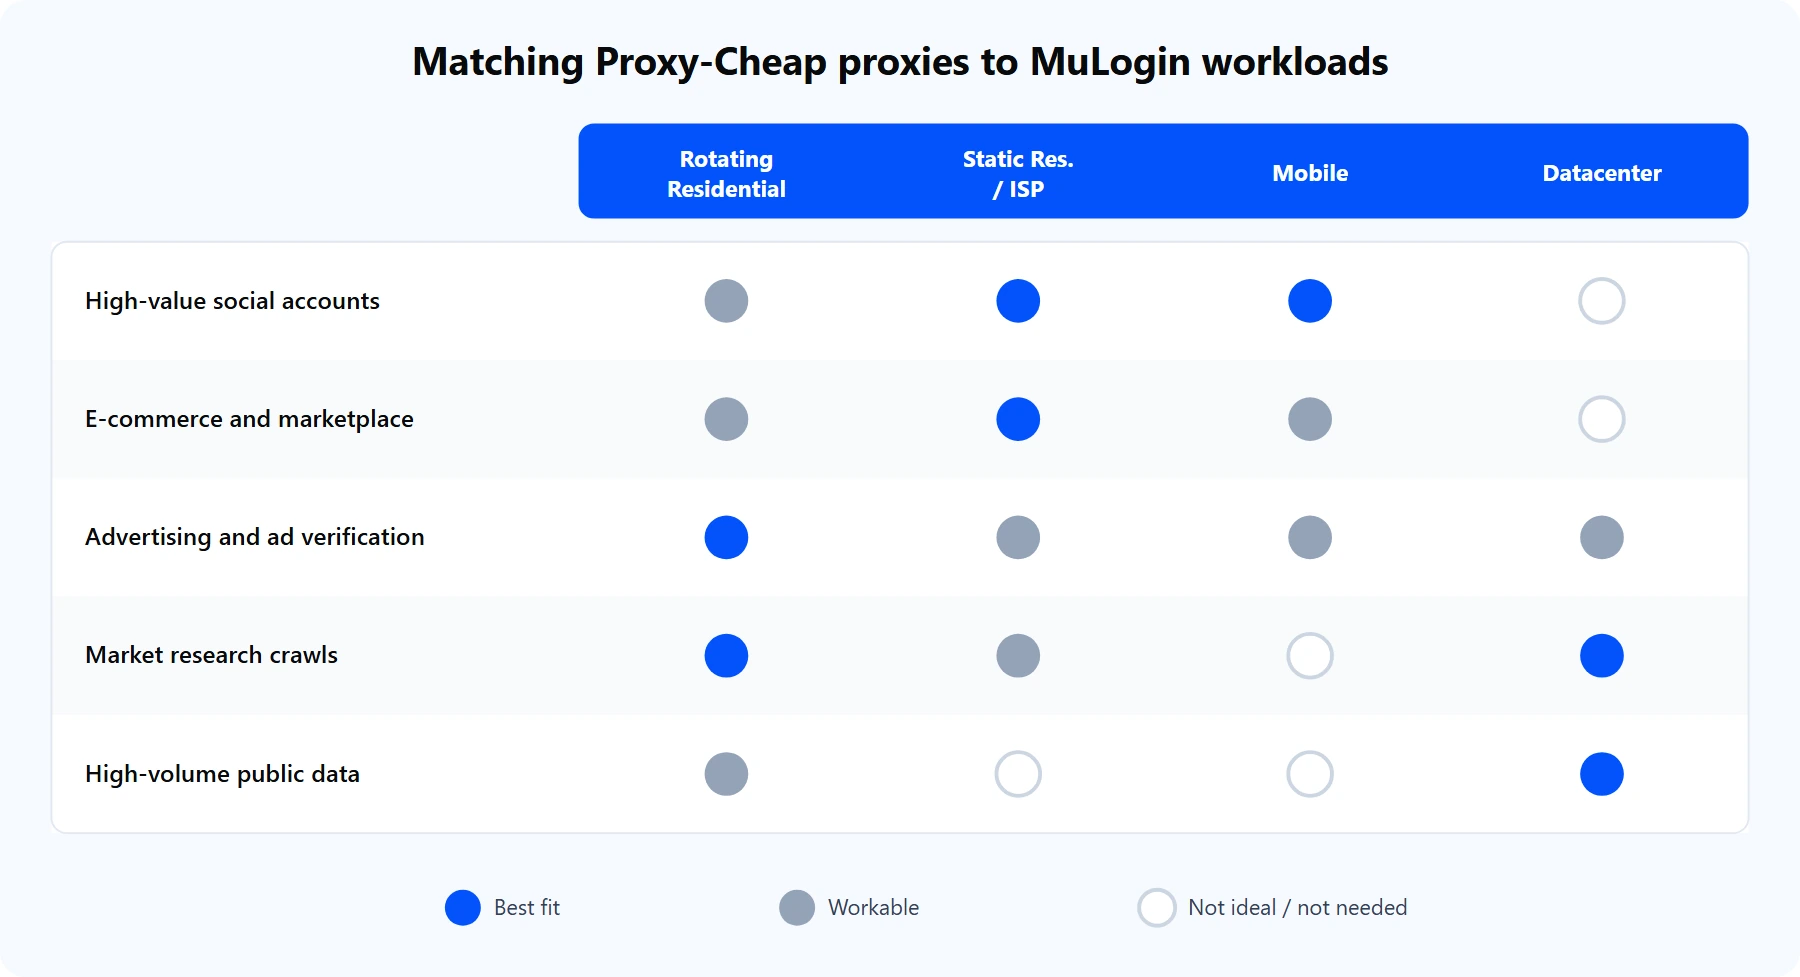
Match the proxy type to the account. Persistent identities want static IPs; broad research tasks want rotation and throughput.
Three picks cover almost every case. For an account that must keep one steady identity, static residential (ISP) proxies hold the same IP for the life of the profile. For the highest-trust consumer profile, mobile proxies route through real carrier networks. For high-volume research where throughput matters more than a consumer footprint, datacenter proxies deliver speed at predictable per-IP pricing. All of them plug into the same MuLogin proxy fields you configured above, with pay-as-you-go pricing and no monthly commitment.